Overview
The Serverlesspresso application consists of three frontends and a backend application. The frontends are already built and deployed in an AWS-owned account. Some of backend resources will be pre-deployed into your workshop account during the Setup sections.
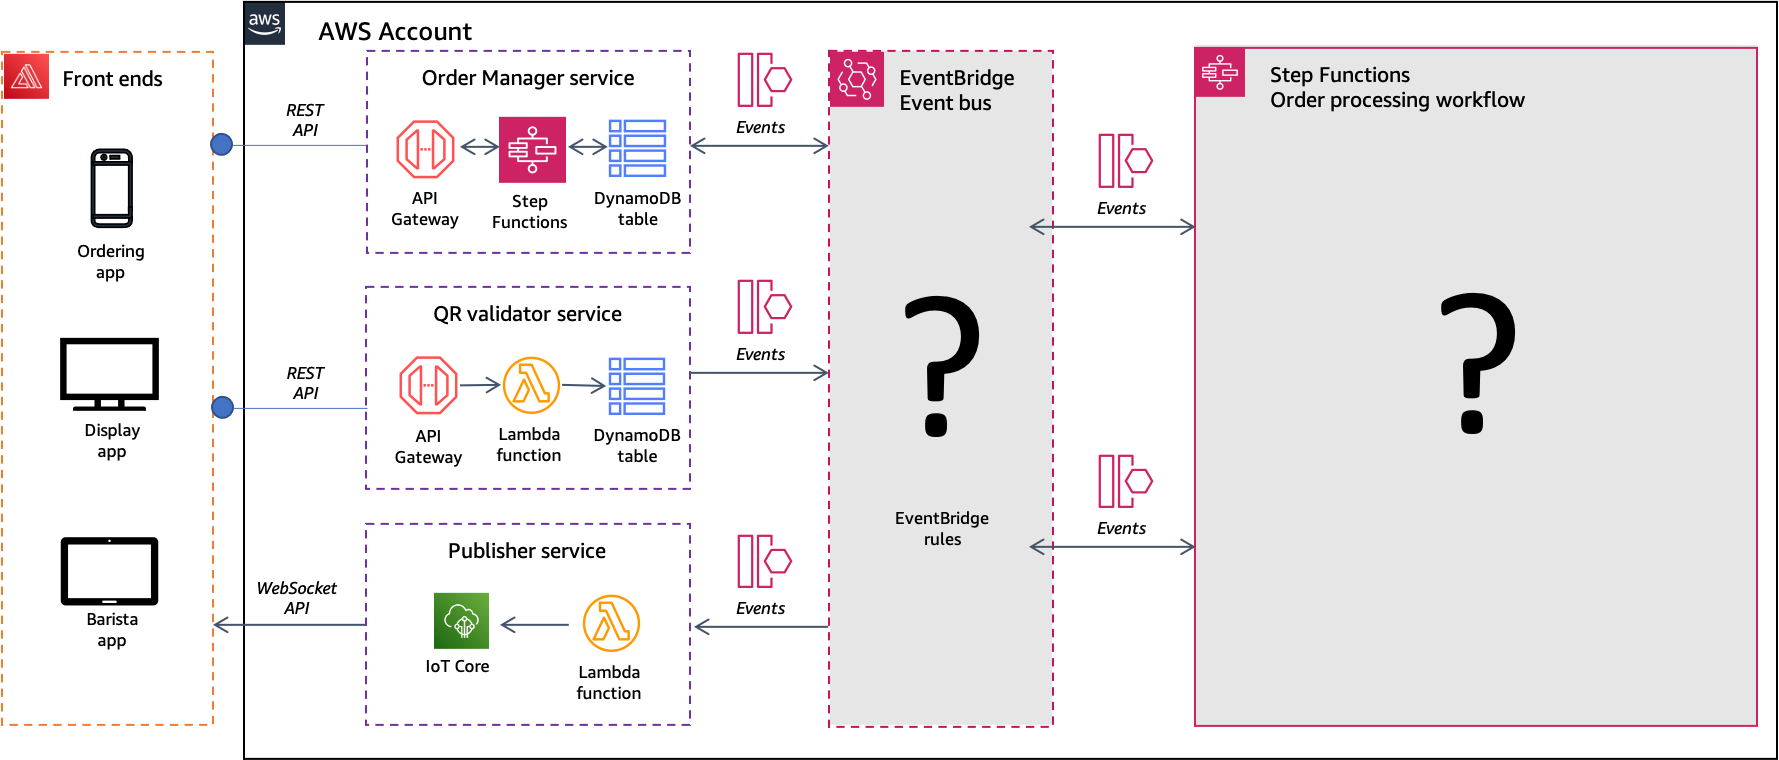
The backend is a set of serverless microservices:
- The Counting microservice - Uses an Amazon DynamoDB table for incrementing order numbers sequentially.
- The OrderManager microservice - Provides an API to send/update/cancel a coffee order. Consists of a DynamoDB table containing the state of each customer order.
- The Config microservice - Uses a DynamoDB table containing information about menu items and shop status, along with an Amazon API Gateway resource to provide authenticated access.
- The Publisher microservice - Routes events to different IoT core topics. IoT Core publishes event messages to front-end applications.
- The QR Validator microservice - Provides QR codes to front end display application, Codes are sorted in a DynamoDB table and used to validate each order.
In the following sections, you will fill in the missing pieces in the diagram above:
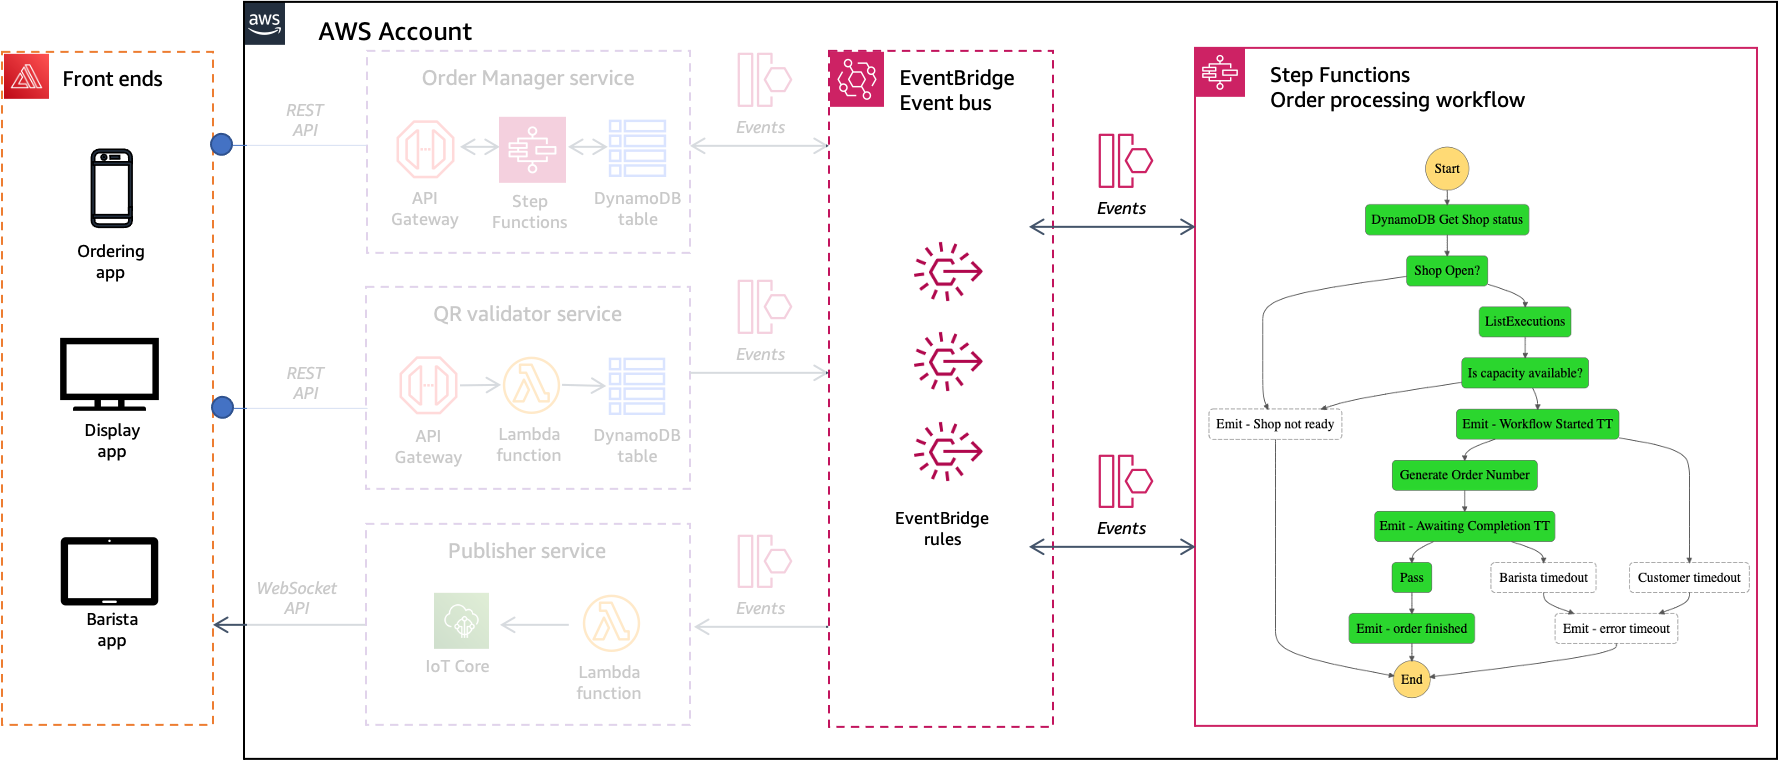
- The OrderProcessor microservice - an AWS Step Functions Workflow, that orchestrates each customer order from start to completion
- The event routing logic routes events to the correct downstream service (consumer).
Once you have built the back-end resources needed, you will update the front-end application configuration to query the API Gateway endpoint and display the information about all the current menu and order status.
Each of the following sections provides an implementation overview and detailed, step-by-step instructions.
Please ensure that you follow the instructions in the order listed.
Next steps
In the next module, you’ll learn about workflows and state machines, and build the main workflow that powers the application.
Now you are ready to start building 👷