Creating the workflow
Overview
- You will create a new workflow in AWS Step Functions.
- You will test the new workflow and see the input and output payloads.
After this section, you will have a workflow that you will use to build out the application functionality.
Creating the Step Functions workflow.
Step-by-step instructions
-
Go to the Step Functions console. From the AWS Management Console, select Services then select Step Functions under Application Integration. Make sure your region is correct.
-
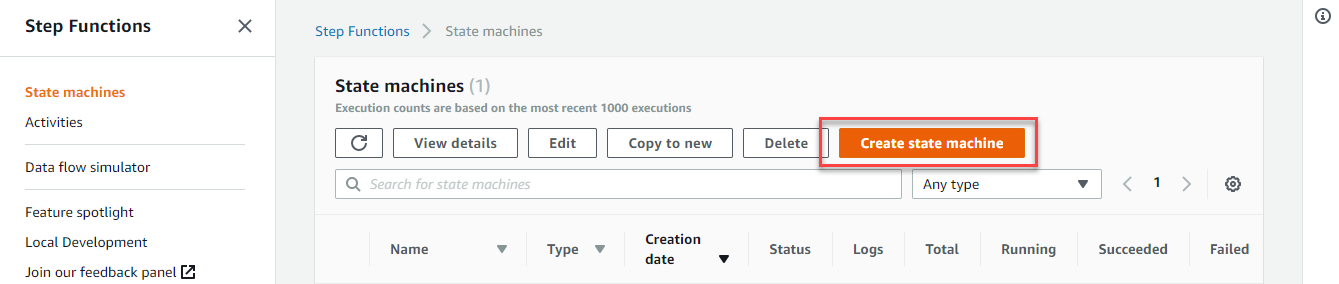
Choose Create state machine.
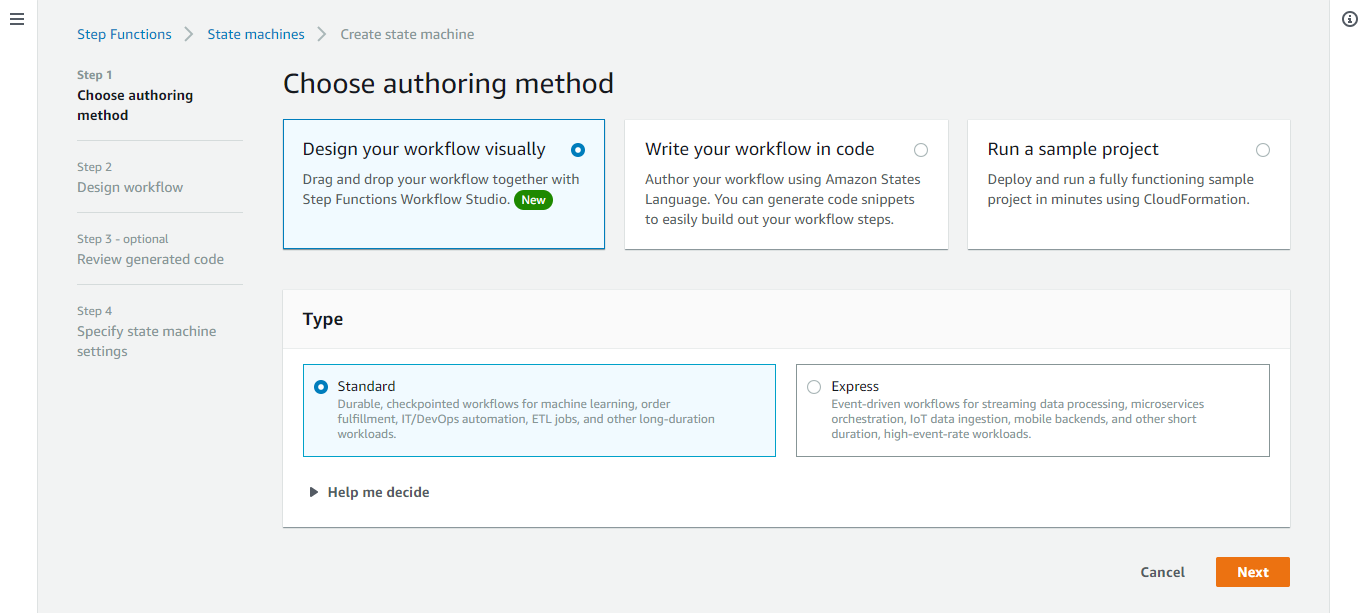
- On the Create state machine page, Step 1:
- For Choose authoring mode, select Design your workflow visually.
- For Type, select Standard.
- Choose Next.
- In Step 2, you design the workflow with the Workflow Studio. Here are the main areas of the user interface:
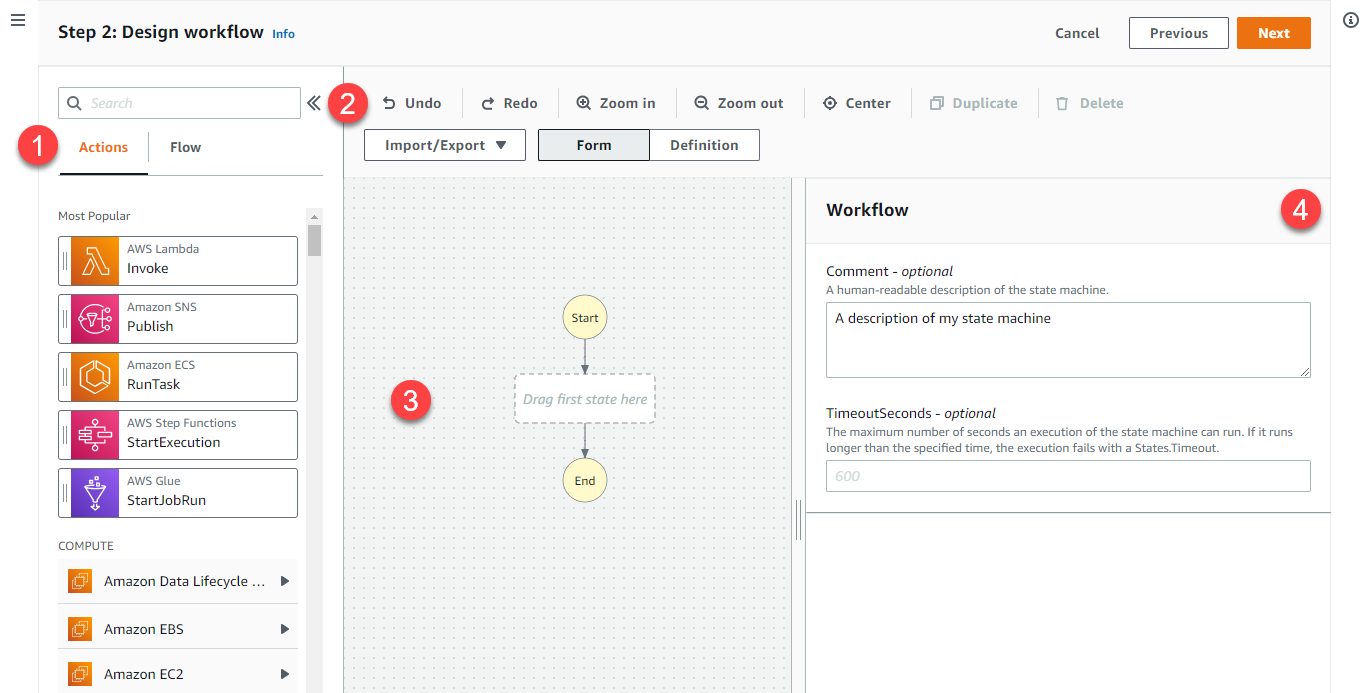
(1) On this tab, you choose between Actions and Flow. Actions represent steps you can take with AWS services, such as invoking an AWS Lambda function. Flow shows options to manage control flow logic, such as choice states or parallel logic.
(2) The toolbar at the top enables you to undo or redo changes or change the layout of the workflow visualization.
(3) The workflow visualization shows a flowchart of the current workflow. You can click on elements in this flow and drag and drop to make changes.
(4) The right panel shows options for the currently selected element. In a new workflow like this, you can set a comment or a timeout value for the entire workflow.
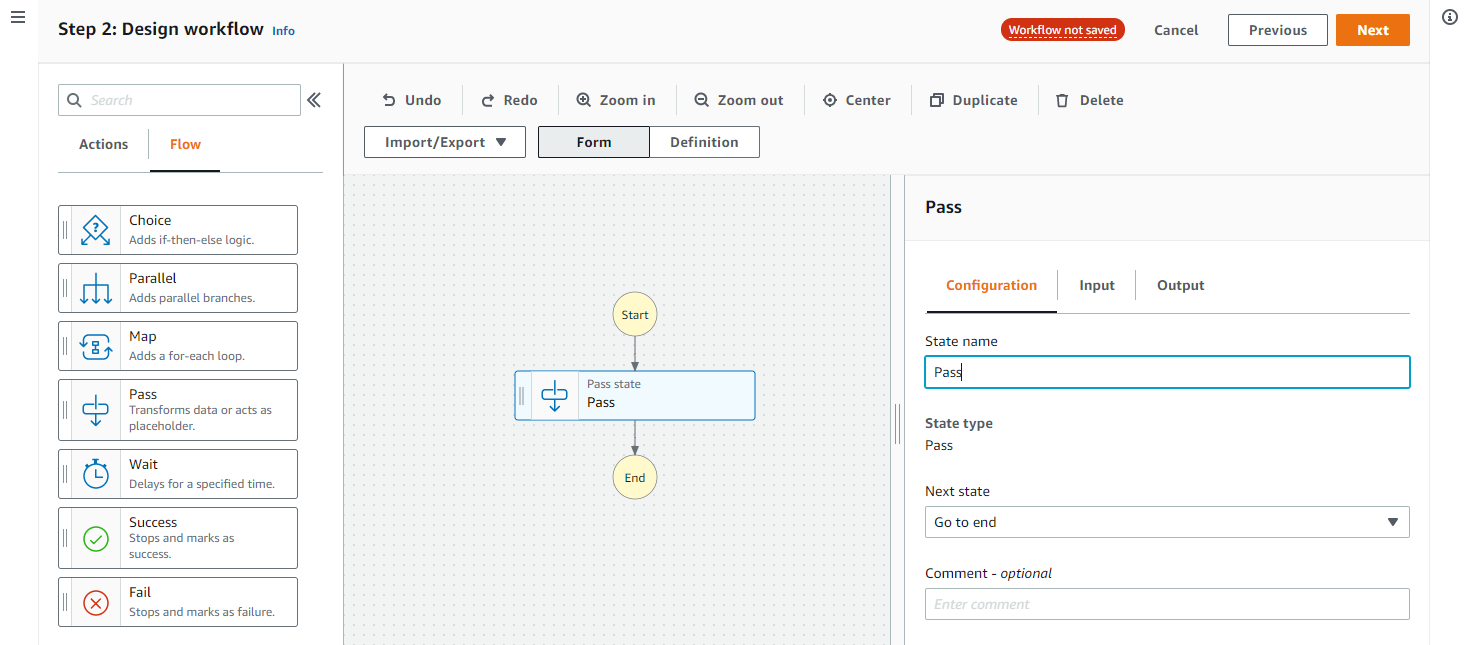
- Select the Flow tab and then drag a Pass state from the menu on the left to the the box in the workflow visualiation that reads Drag first state here. Choose Next
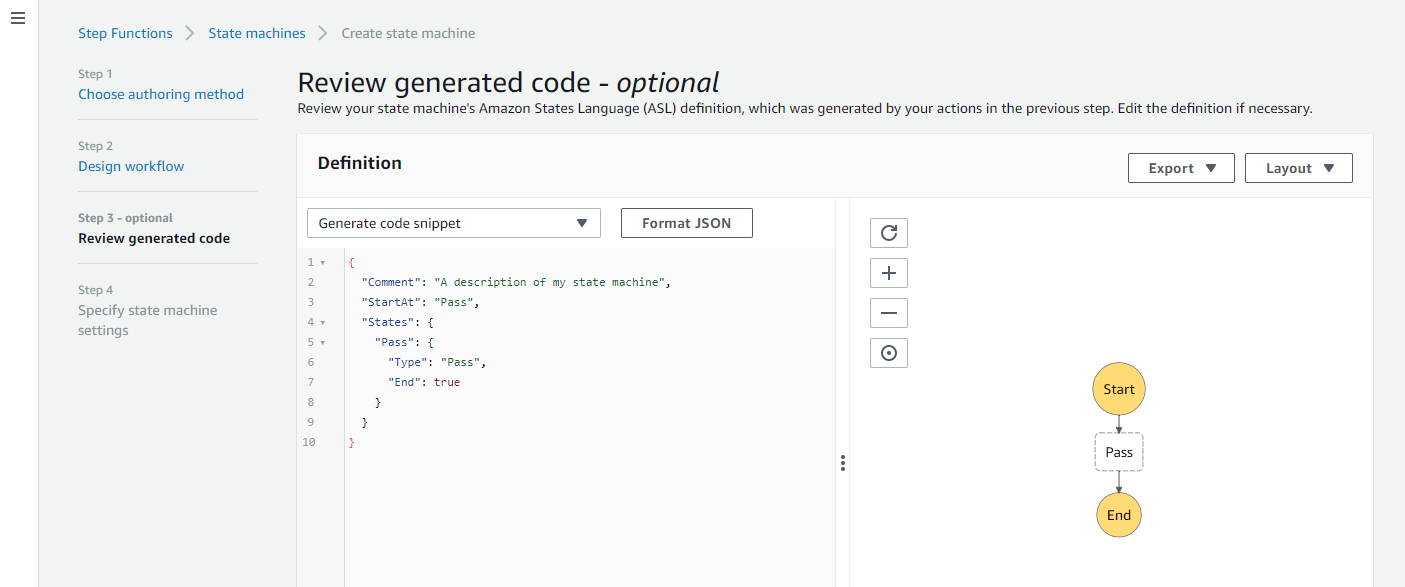
- On the Review generated code page, this shows the definition of the workflow you’ve built so far. The left panel shows the Amazon States Language (ASL) language definition in JSON; the right shows a visual flowchart of the workflow. Choose Next.
- On the Specify state machine settings page, this shows the settings for the new workflow. You can also edit these later.
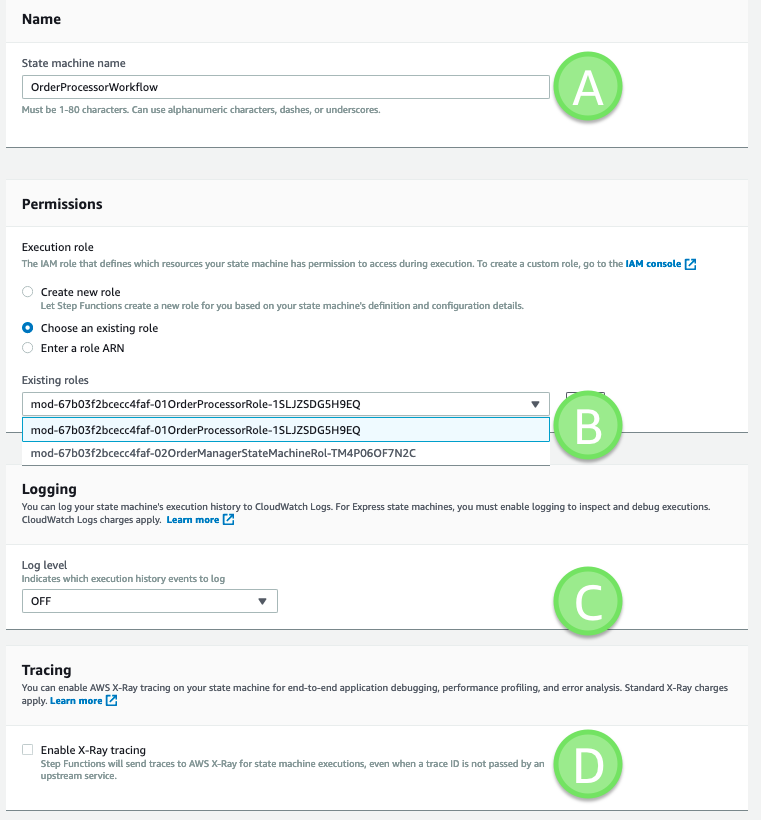
(A) For Name, enter OrderProcessorWorkflow.
(B) For Permissions, choose Choose an existing role. Select the role that contains -01OrderProcessorRole-. This role has been created for you.
Check you selected “01OrderProcessorRole.”
(C) For Logging, keep OFF in the dropdown. If you turn this on, Step Functions will log execution history to CloudWatch Logs.
(D) For Tracing, keep this disabled. When you enable this option, Step Functions sends traces to AWS X-Ray to help provide observability in your workload.
Once you have added the name and set these options, choose Create state machine.
Congratulations, you have created your first Step Functions workflow using the Workflow Studio designer!
Testing the Step Functions workflow.
In this section, you will test the new workflow.
Step-by-step instructions
-
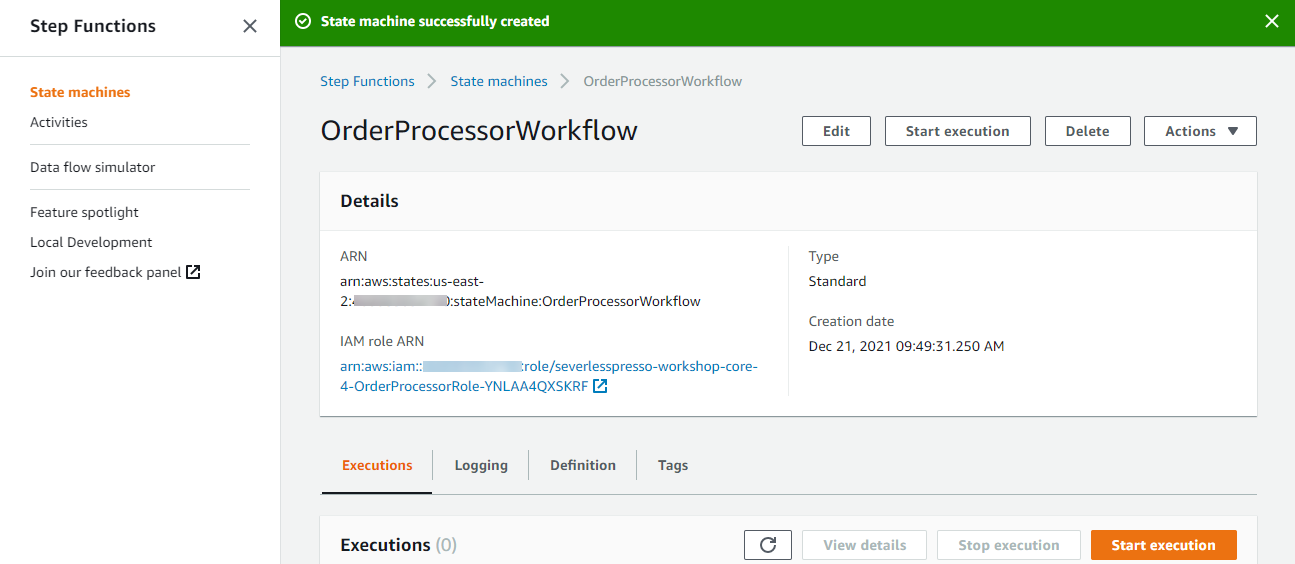
From the previous section, on the page showing the new workflow, choose Start execution.
-
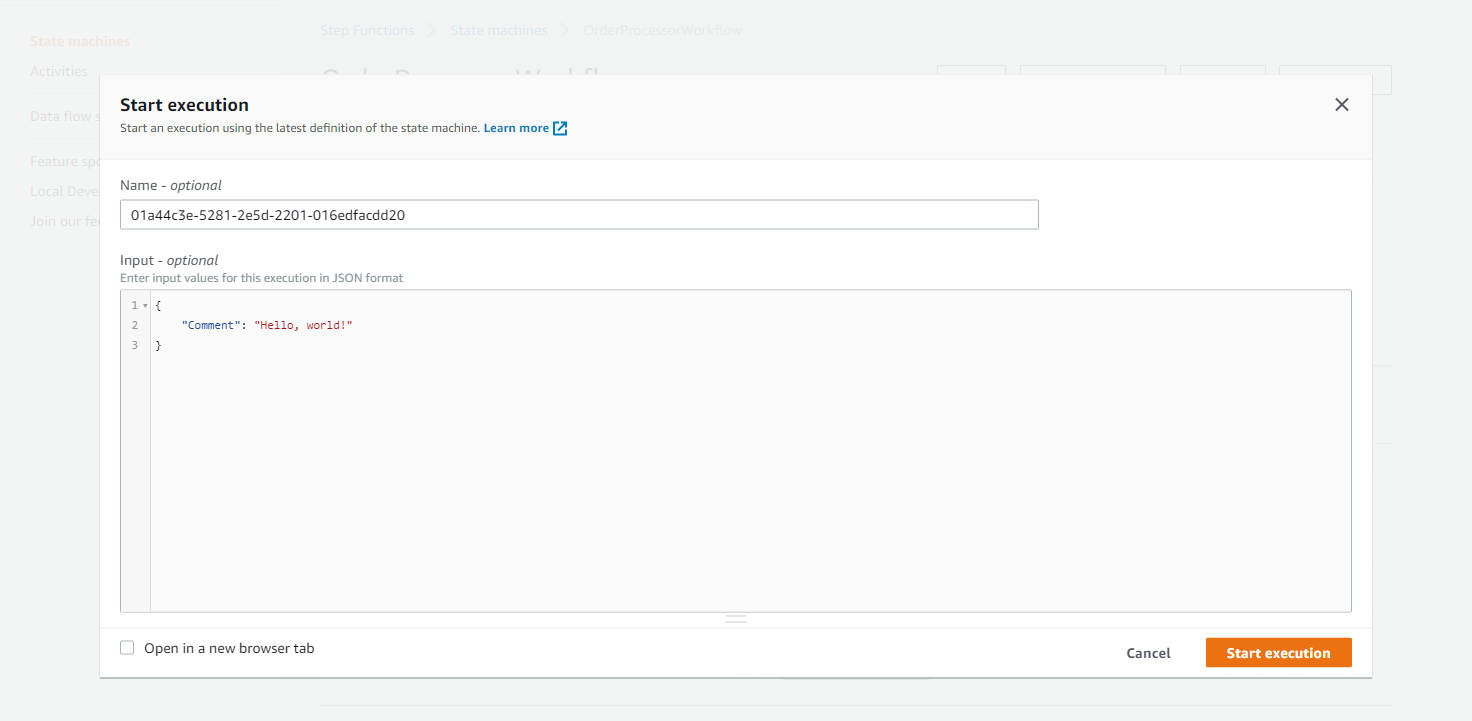
In the Start execution pop-up, edit the input JSON so the comment value reads “Hello, world!”. Each execution starts with an input payload where you will pass parameters about the request. Choose Start execution.
- After the execution is finished, the console shows a results page.
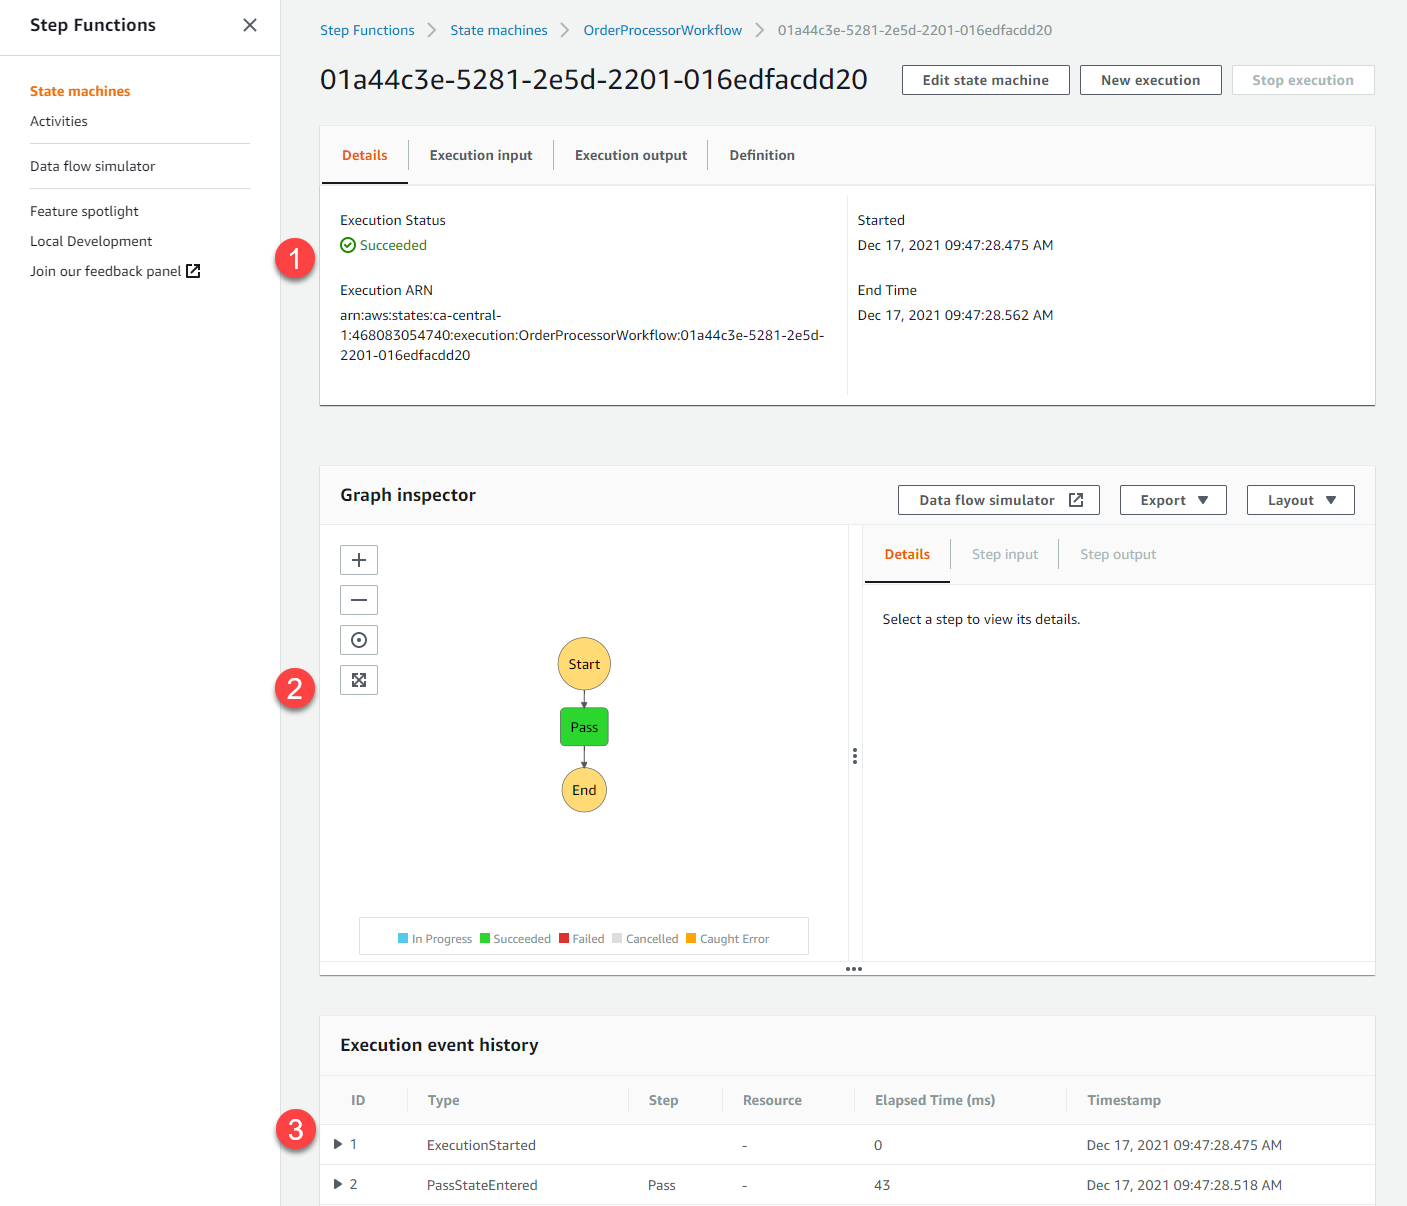
(1) The Execution status shows Succeeded. This panel also the start and end time for the execution and an Amazon Resource Name (ARN) reference.
(2) The Graph inspector shows the flow of this execution with the flow path highlighted in green and any error states in red. You can select each element and see the input and output.
(3) The Execution event history shows each event during the execution and the cumulative elapsed time. Every workflow has an ExecutionStarted event. This simple workflow with one pass state has a PassStateEntered and PassStateExited event. Click the triangle next to each event to show the input and output payload for each event.

Recap
- In this section, you created the application’s workflow using the Workflow Studio.
- You walked through the different user interfaces you will use for the rest of this module.
- You tested the simple workflow from the console and saw how to use the execution event history to see the input and output payloads that are passed between states.
Next steps
Next, you’ll start building functionality into the workflow.