End-to-end test
Overview
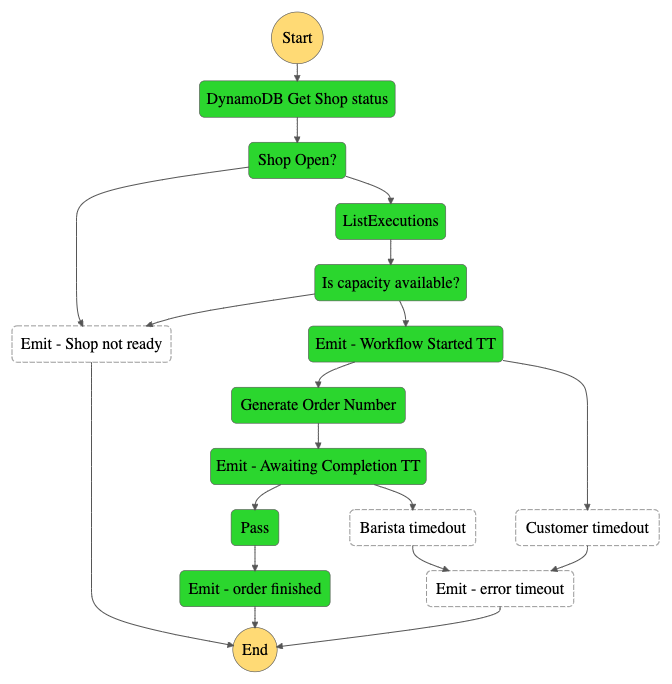
In this section, you will test both workflows. The OrderProcessor workflow manages the overall path of an individual drink order. The OrderManager workflow handles drink updates and status changes. By interacting with both, you can complete an order from start to finish.
There are 3 steps:
- Creating a new drink order.
- Adding the drink detail to the order.
- Completing the order
Setting up your browser tabs
This section moves between different workflows and services. To prepare, open multiple tabs in your browser:
- In the first tab, go to the Step Functions console and open the OrderProcessorWorkflow. This is the workflow you built in module 1.
- In the second tab, go to the Step Functions console and open the OrderManagerStateMachine. This workflow was deployed in the setup module.
- Ensure you have the EventBridge Console open in another tab.
- Finally, open the DynamoDB Console open in another tab.
The instructions below will use all of these tabs, so leave these open for the duration of this section.
1. Creating a new drink order
First, create a new workflow execution to simulate an incoming order caused by a customer scanning a QR code.
Step-by-step instructions
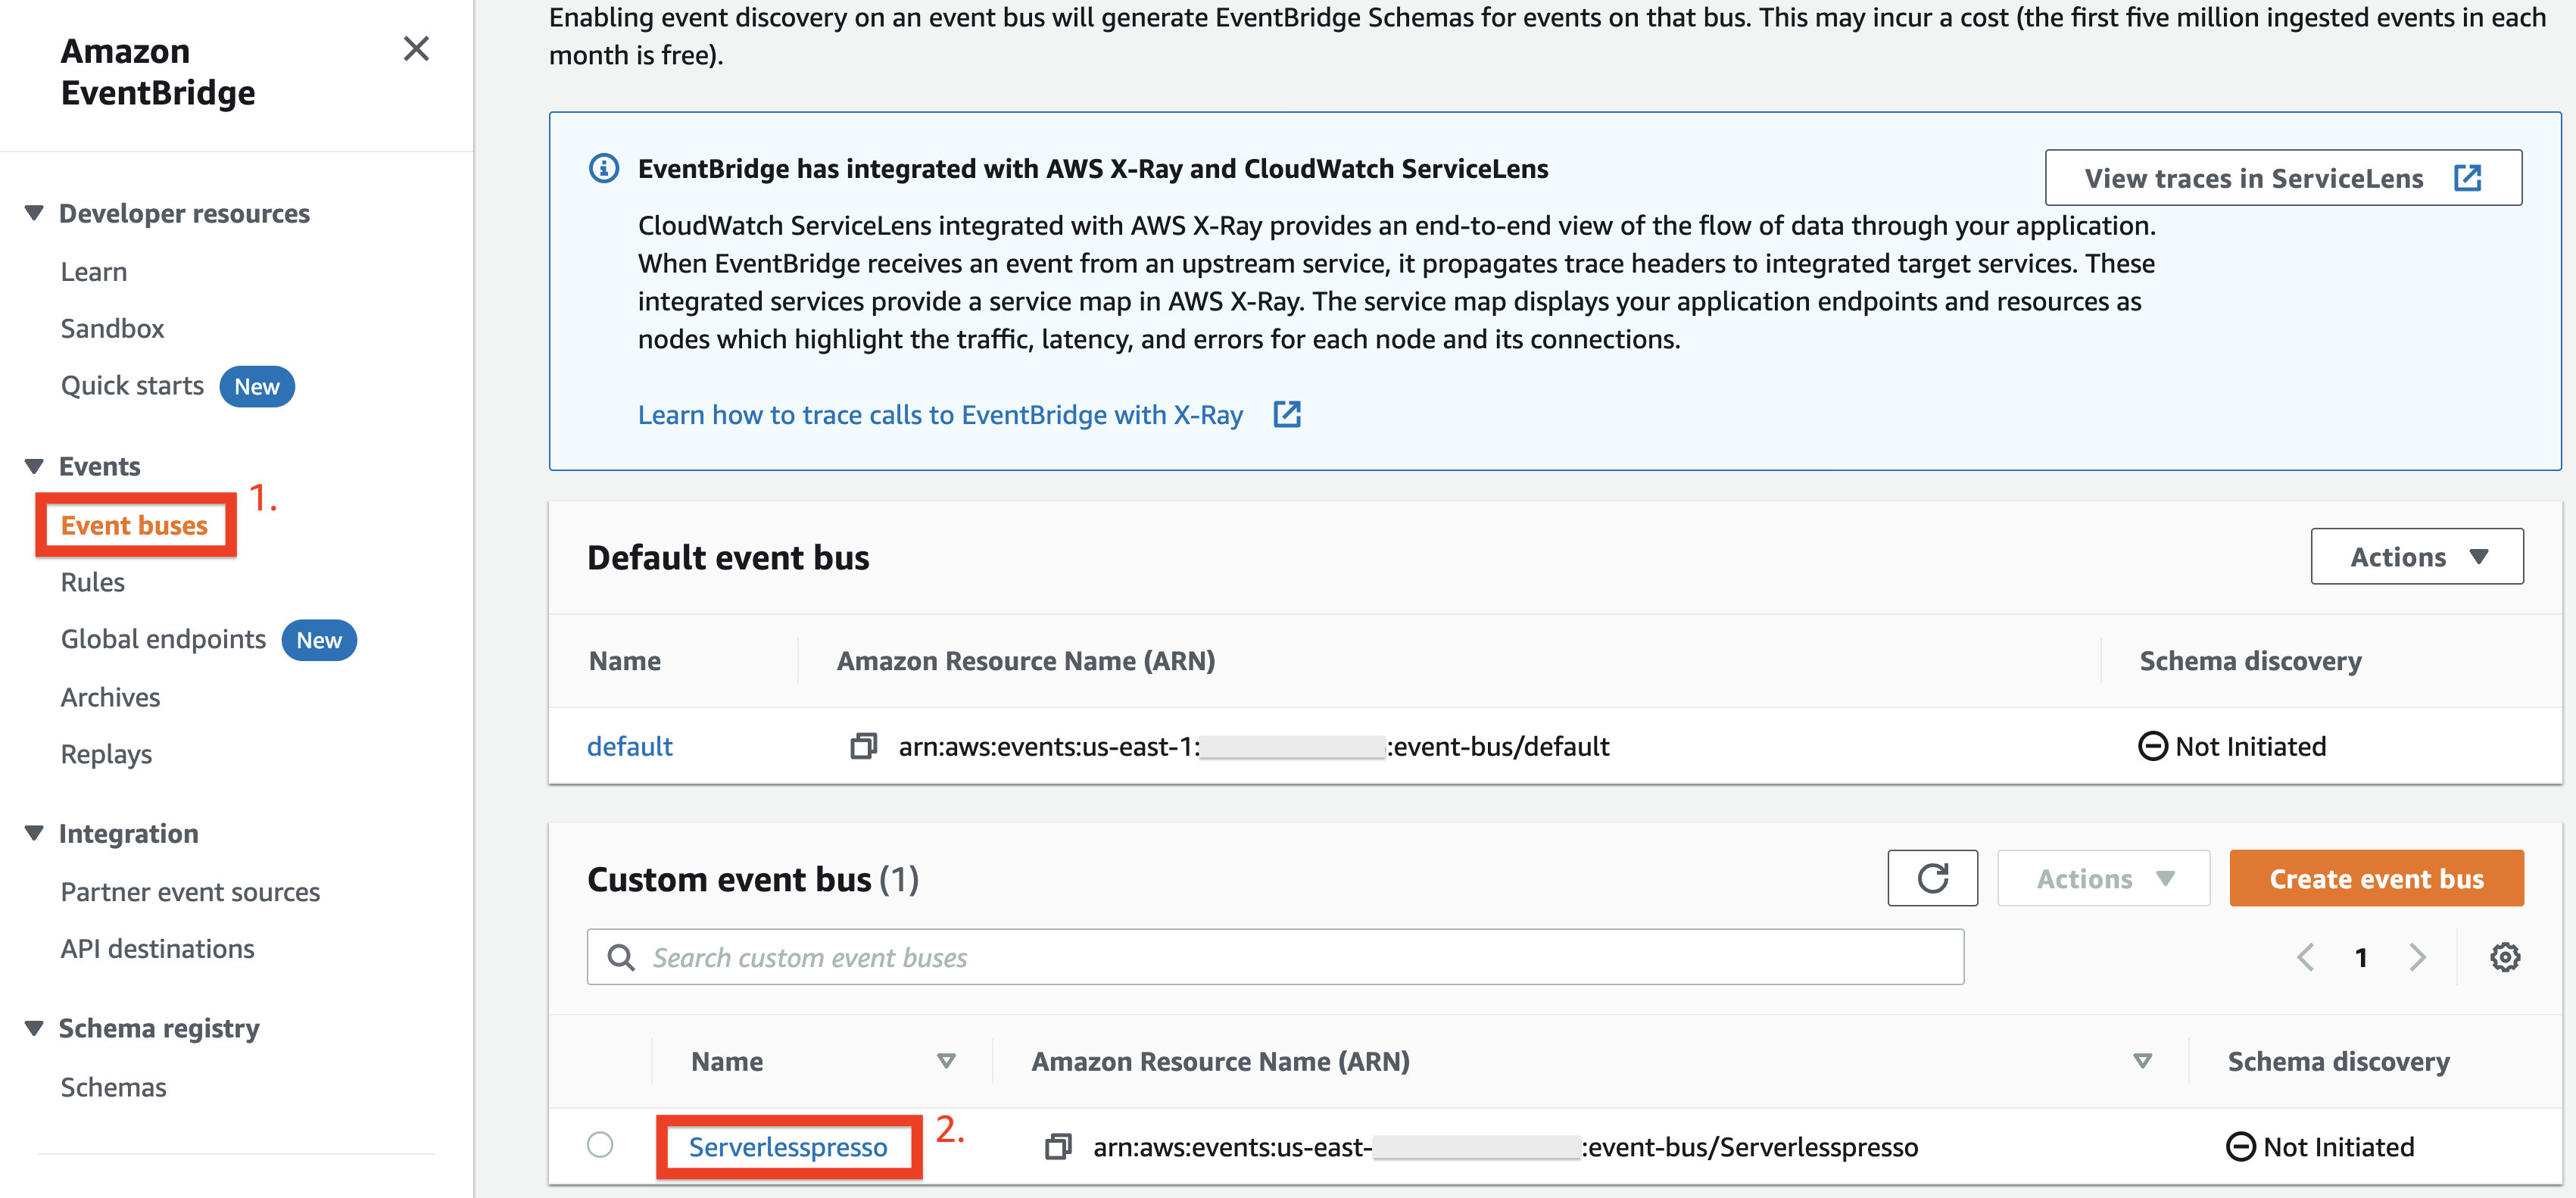
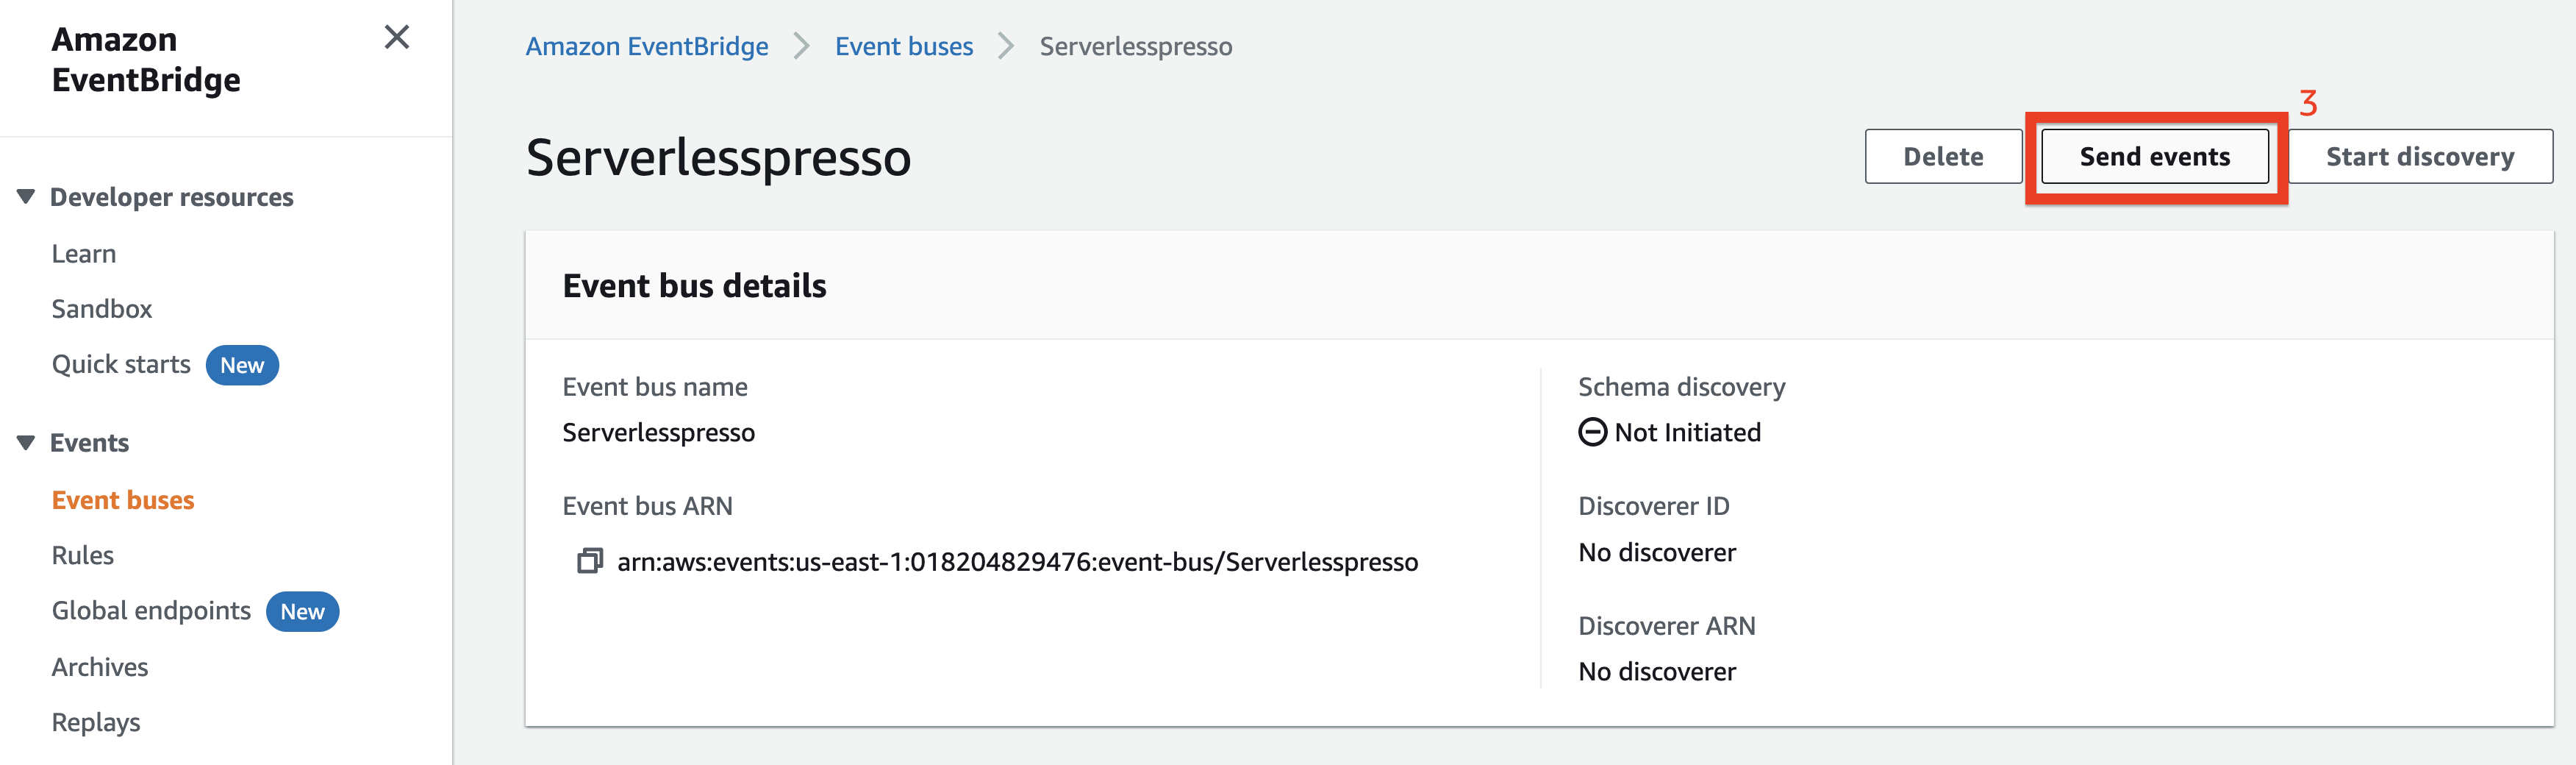
To start a new workflow, from the AWS EventBridge Console, under Events:
-
Choose Event busses.
-
Choose the Serverlesspresso event bus
-
Choose Send events
-
Check that the serverlesspresso event bus is selected
-
Copy the following into the Event source input:
awsserverlessda.serverlesspresso
- Copy the following into the Detail type input:
Validator.NewOrder
- Copy the following into the Event detail input:
{"userId":"1","orderId":"2"}
-
Choose Send
-
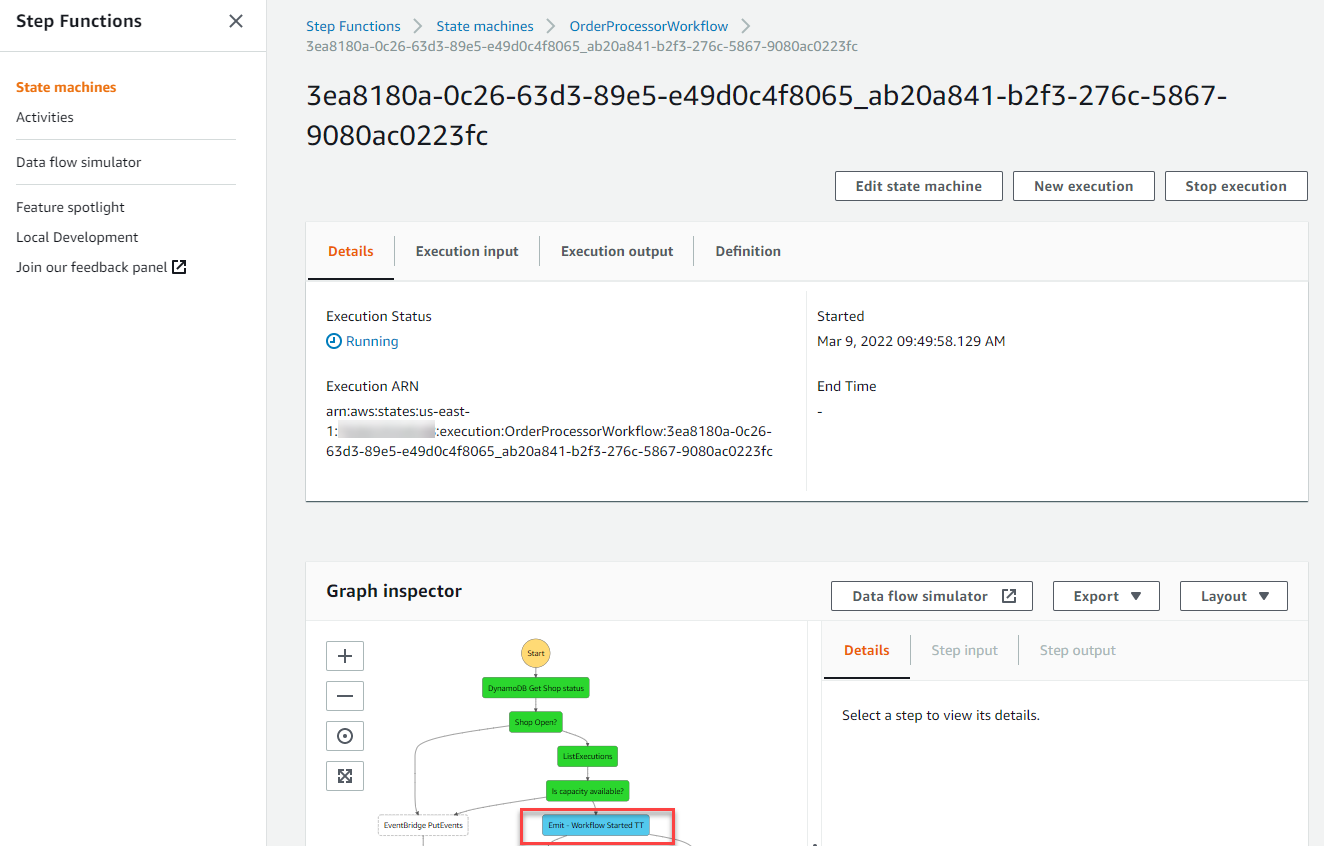
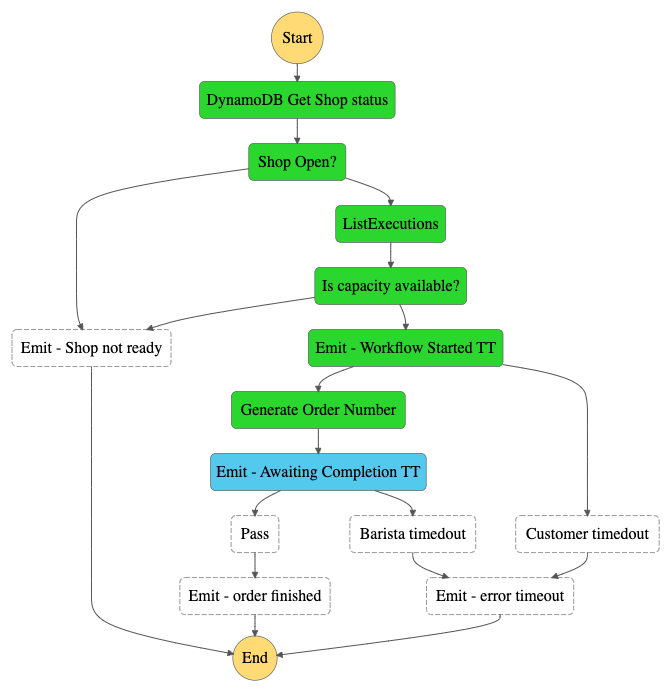
Go to the OrderProcessorWorkflow tab. In the Executions panel, open the most recent execution in a Running state.
-
The Workflow is paused at the WorkflowStarted state. The first
TaskTokenhas been saved to the serverlesspresso-order-table inDynamoDB. -
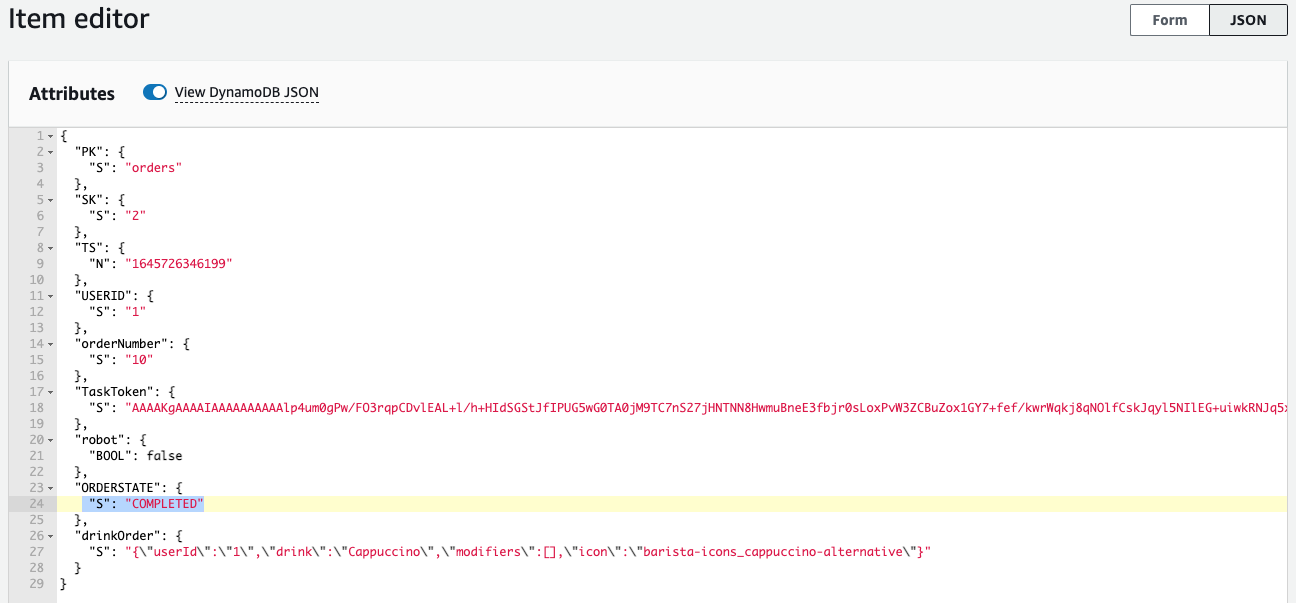
Go to the serverlesspresso-order-table.
-
Find the entry where SK is “2”. Choose Orders from the PK column to open the item detail.

-
The
TaskTokenis stored here together with the unique order ID. The application uses this to resume the workflow later.
2. Adding the drink detail to the order
In the previous section, you discovered how the OrderManager workflow is used to sanitize, update, cancel orders, and resume the OrderProcessor workflow by returning the correct TaskToken.
Here, you will add detail to the drink order, simulating a customer configuring their order in the Customer App. You do this by running an OrderManager workflow to update the OrderProcessor state machine.
Step-by-step instructions
-
Go to the OrderManager workflow tab.
-
Choose Start execution. Enter the following into the input text area and choose Start execution:
{"action":"","body":{"userId":"1","drink":"Cappuccino","modifiers":[],"icon":"barista-icons_cappuccino-alternative"},"orderId":"2","baristaUserId":"3"}
-
In the OrderManager workflow for this execution, this execution is now completed.
-
In the OrderProcessor tab, the workflow has resumed, allowing it to progress to the next
TaskTokenstep.
-
The WaitingCompletion event is emitted to the Serverlesspresso event bus. The event is routed to the WaitingCompletion Lambda function, which updates the serverlesspresso-order-table with the newly generated orderNumber and
TaskToken. -
To verify this, go to the serverlesspresso-order-table. You can see a new column orderNumber, containing the human-readable order number.
-
In the OrderProcessor tab, the workflow has paused at this step until the barista notifies the application that the order has been completed.
3. Claiming the order
Next, use the OrderManager workflow to simulate the barista claiming the order.
-
Go to the OrderManager workflow tab.
-
Choose Start execution. Enter the following into the input text area and choose Start execution:
{
  "action": "make",
  "body": {},
  "orderId": "2",
  "baristaUserId": "3"
}
- The OrderManager workflow updates DynamoDB table with the barista’s order ID and emits a new event.
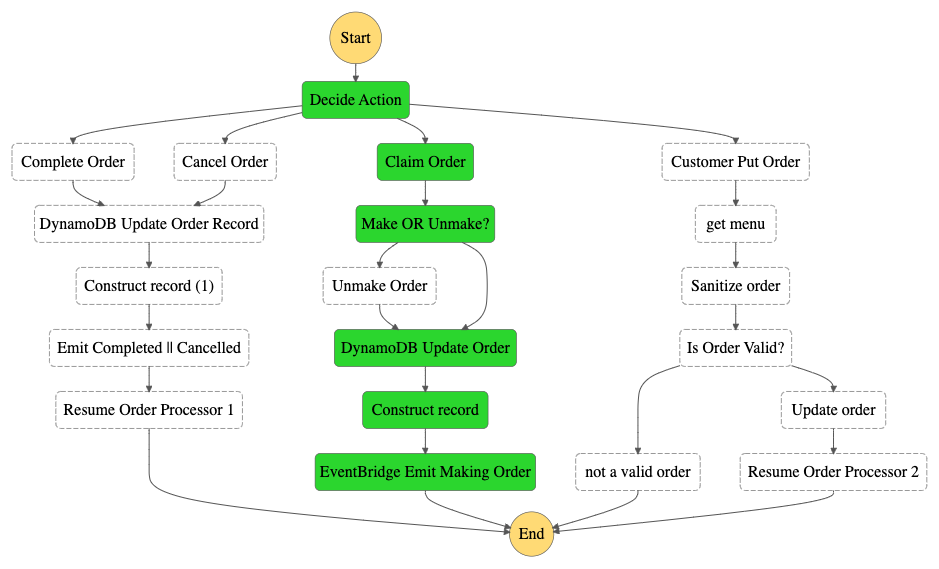
4. Completing the order
Finally, use the OrderManager workflow to simulate the barista completing the order.
Step-by-step instructions
-
Go to the OrderManager workflow tab.
-
Choose Start execution. Enter the following into the input text area and choose Start execution. Notice that the input payload contains the
action:complete.
{"action":"complete","body":{"userId":"1","drink":"Cappuccino","modifiers":[],"icon":"barista-icons_cappuccino-alternative"},"orderId":"2","baristaUserId":"3"}
- The OrderManager workflow updates DynamoDB table and resumes the OrderProcessor workflow:
In the OrderProcessor tab, the execution also completes:
- In the serverlesspresso-order-table, the drink order is updated, with status Completed:
Recap
- You started the OrderProcessor workflow from the CLI to simulate a new order arriving.
- You used OrderManager workflows to simulate the customer order entry and the barista completing the order.
- You saw the effect of the persisted state in the DynamoDB table.
Next steps
You have completed the end-to-end backend test for the workflows. In the next module, you will configure a new rule to route events back to the frontend applications. You will be able to run a complete test from the frontend applications.