Waiting for the order
Overview
- You will modify the workflow to wait for the customer to submit their coffee order. To do this, you will add a state with a callback. This pauses the execution at this state until Step Functions receives a callback via the SendTaskSuccess (or SendTaskFailure) APIs with a task token.
- Using the same approach, you will modify the workflow to wait for baristas to make a coffee order.
- You will also use a heartbeat setting to allow the entire workflow to timeout if the customer or barista do not respond.
- You will test the new workflow and see the input and output payloads.
After this section, you will have a workflow that waits for the customer to provide details of their coffee order and then waits for the barista to make an order.
1. Adding a callback state for customer orders
In this section, you add an EventBridge PutEvents state that emits an event when the callback is complete. The workflow waits here until the callback is received. This happens when the customer submits their drink order.
Step-by-step instructions
-
Go to the Step Functions console. From the AWS Management Console, select Services then select Step Functions under Application Integration. Make sure your region is correct.
-
From the left-hand menu, select State machine and choose OrderProcessorWorkflow from the list. Choose Edit.

-
On the next page, choose Workflow Studio to open the workflow in the designer.
-
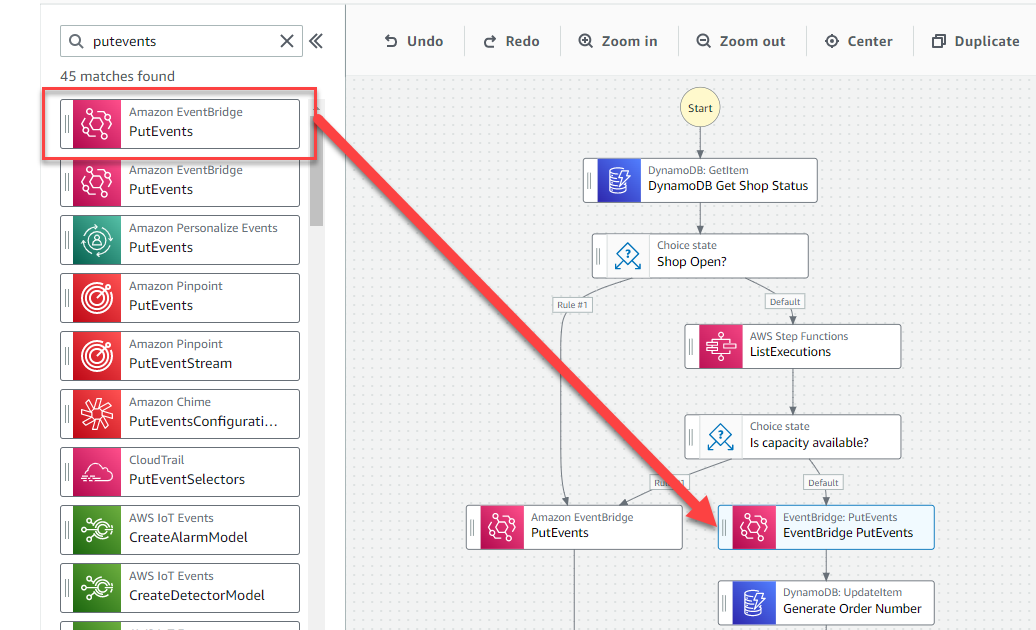
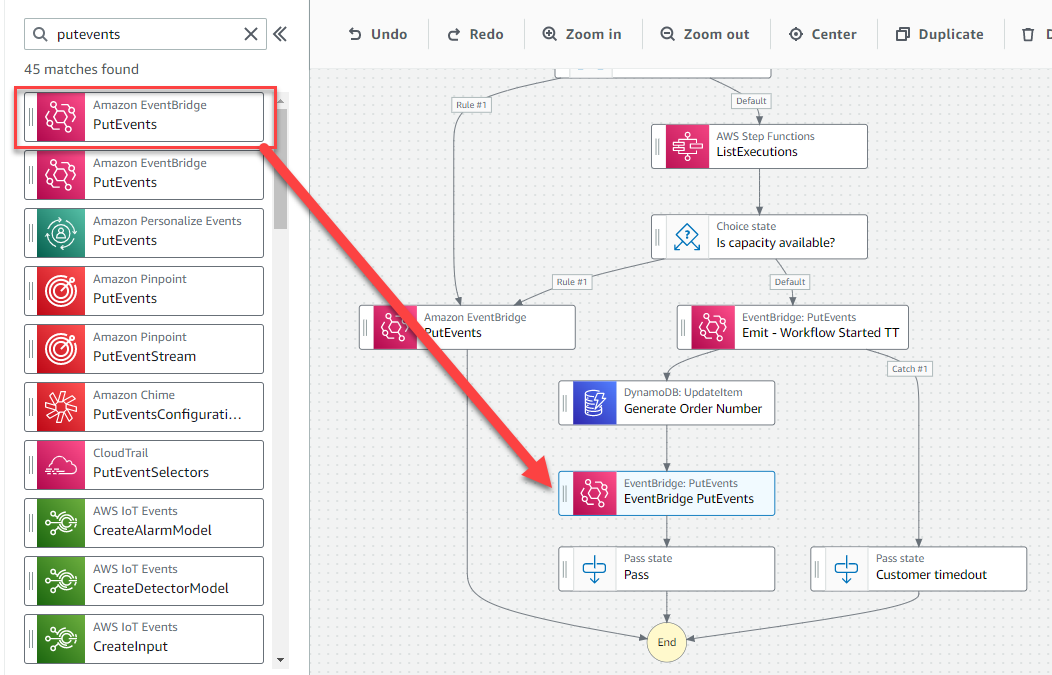
With the Actions tab selected on the left, enter
puteventsin the search bar. Drag the Amazon EventBridge PutEvents action from the list to between the Is capacity available? and Generate Order Number states in the designer.
- With the state selected, the attribute panel on the right shows the configuration for this state. In the Configuration tab:
- For State name, enter
Emit - Workflow Started TT. - For Wait for callback, check this box.
- For API Parameters, paste the following JSON:
{
  "Entries": [
    {
      "Detail": {
        "Message": "The workflow waits for your order to be submitted. It emits an event with a unique 'task token'. The token is stored in an Amazon DynamoDB table, along with your order ID.",
        "TaskToken.$": "$$.Task.Token",
        "orderId.$": "$.detail.orderId",
        "userId.$": "$.detail.userId"
      },
      "DetailType": "OrderProcessor.WorkflowStarted",
      "EventBusName": "Serverlesspresso",
      "Source": "awsserverlessda.serverlesspresso"
    }
  ]
}

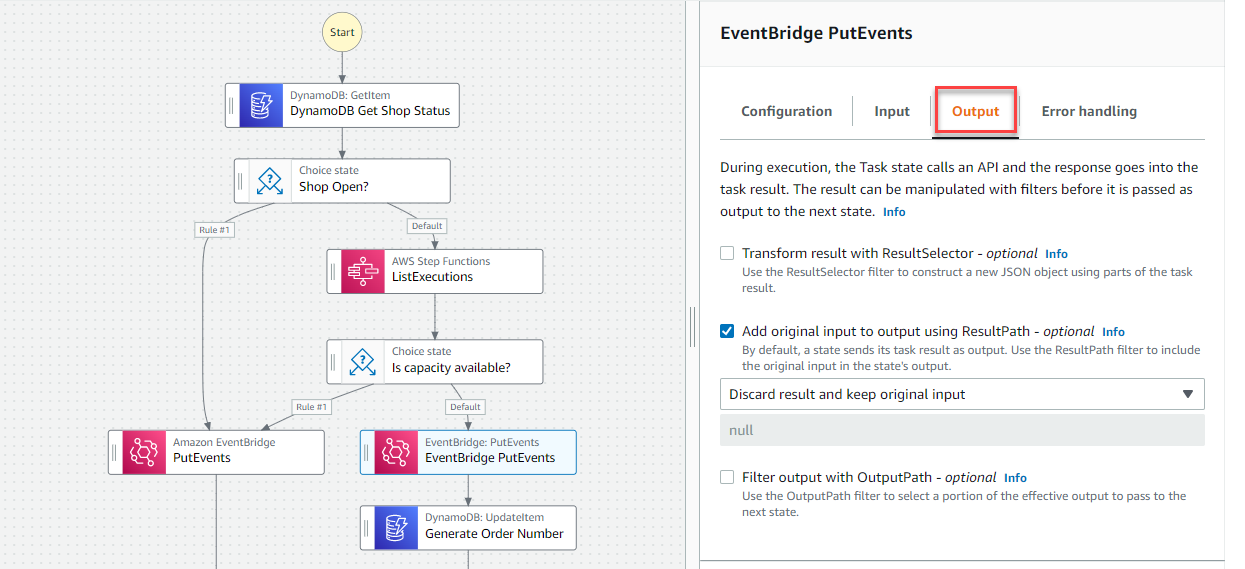
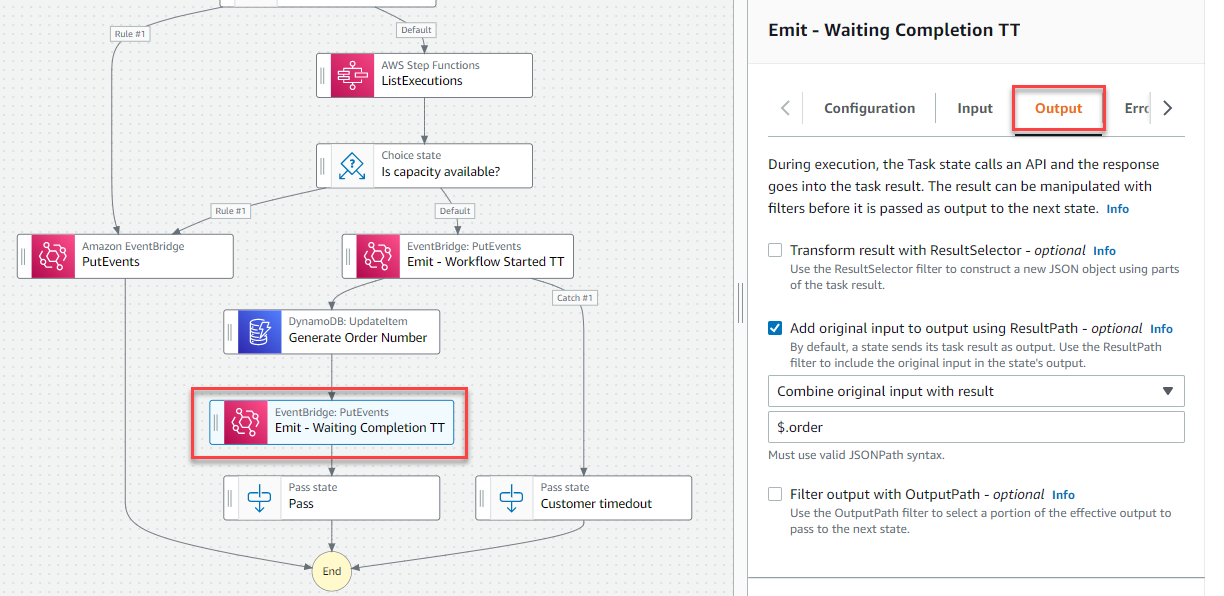
- Choose the Output tab. Here, you will modify the state’s output to include the result from the DynamoDB query:
- Check the box Add original input to output using ResultPath.
- In the dropdown, select Discard result and keep original input.
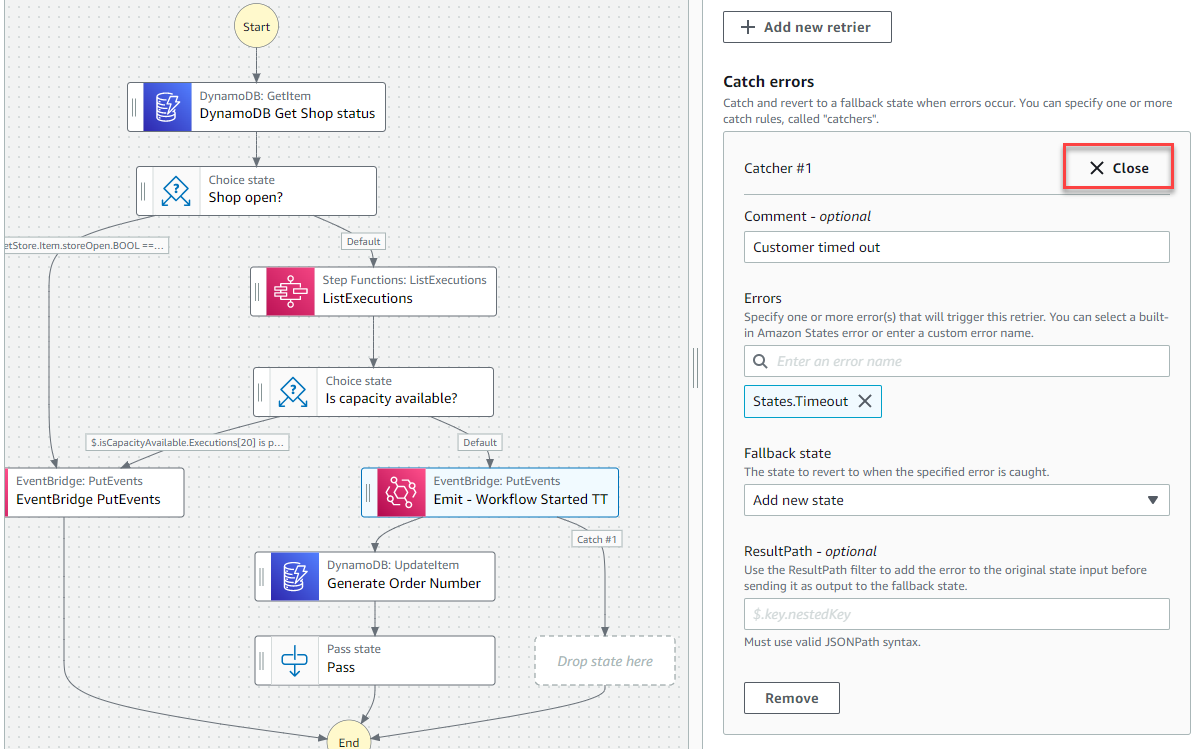
- Choose the Error handling tab. Here, you add a catch state to handle any errors. In Catch errors, choose Add new catcher.
- For Comment, enter
Customer timed out. - For Errors, select States.Timeout.
- For Fallback state, select Add new state.
- Choose Close.
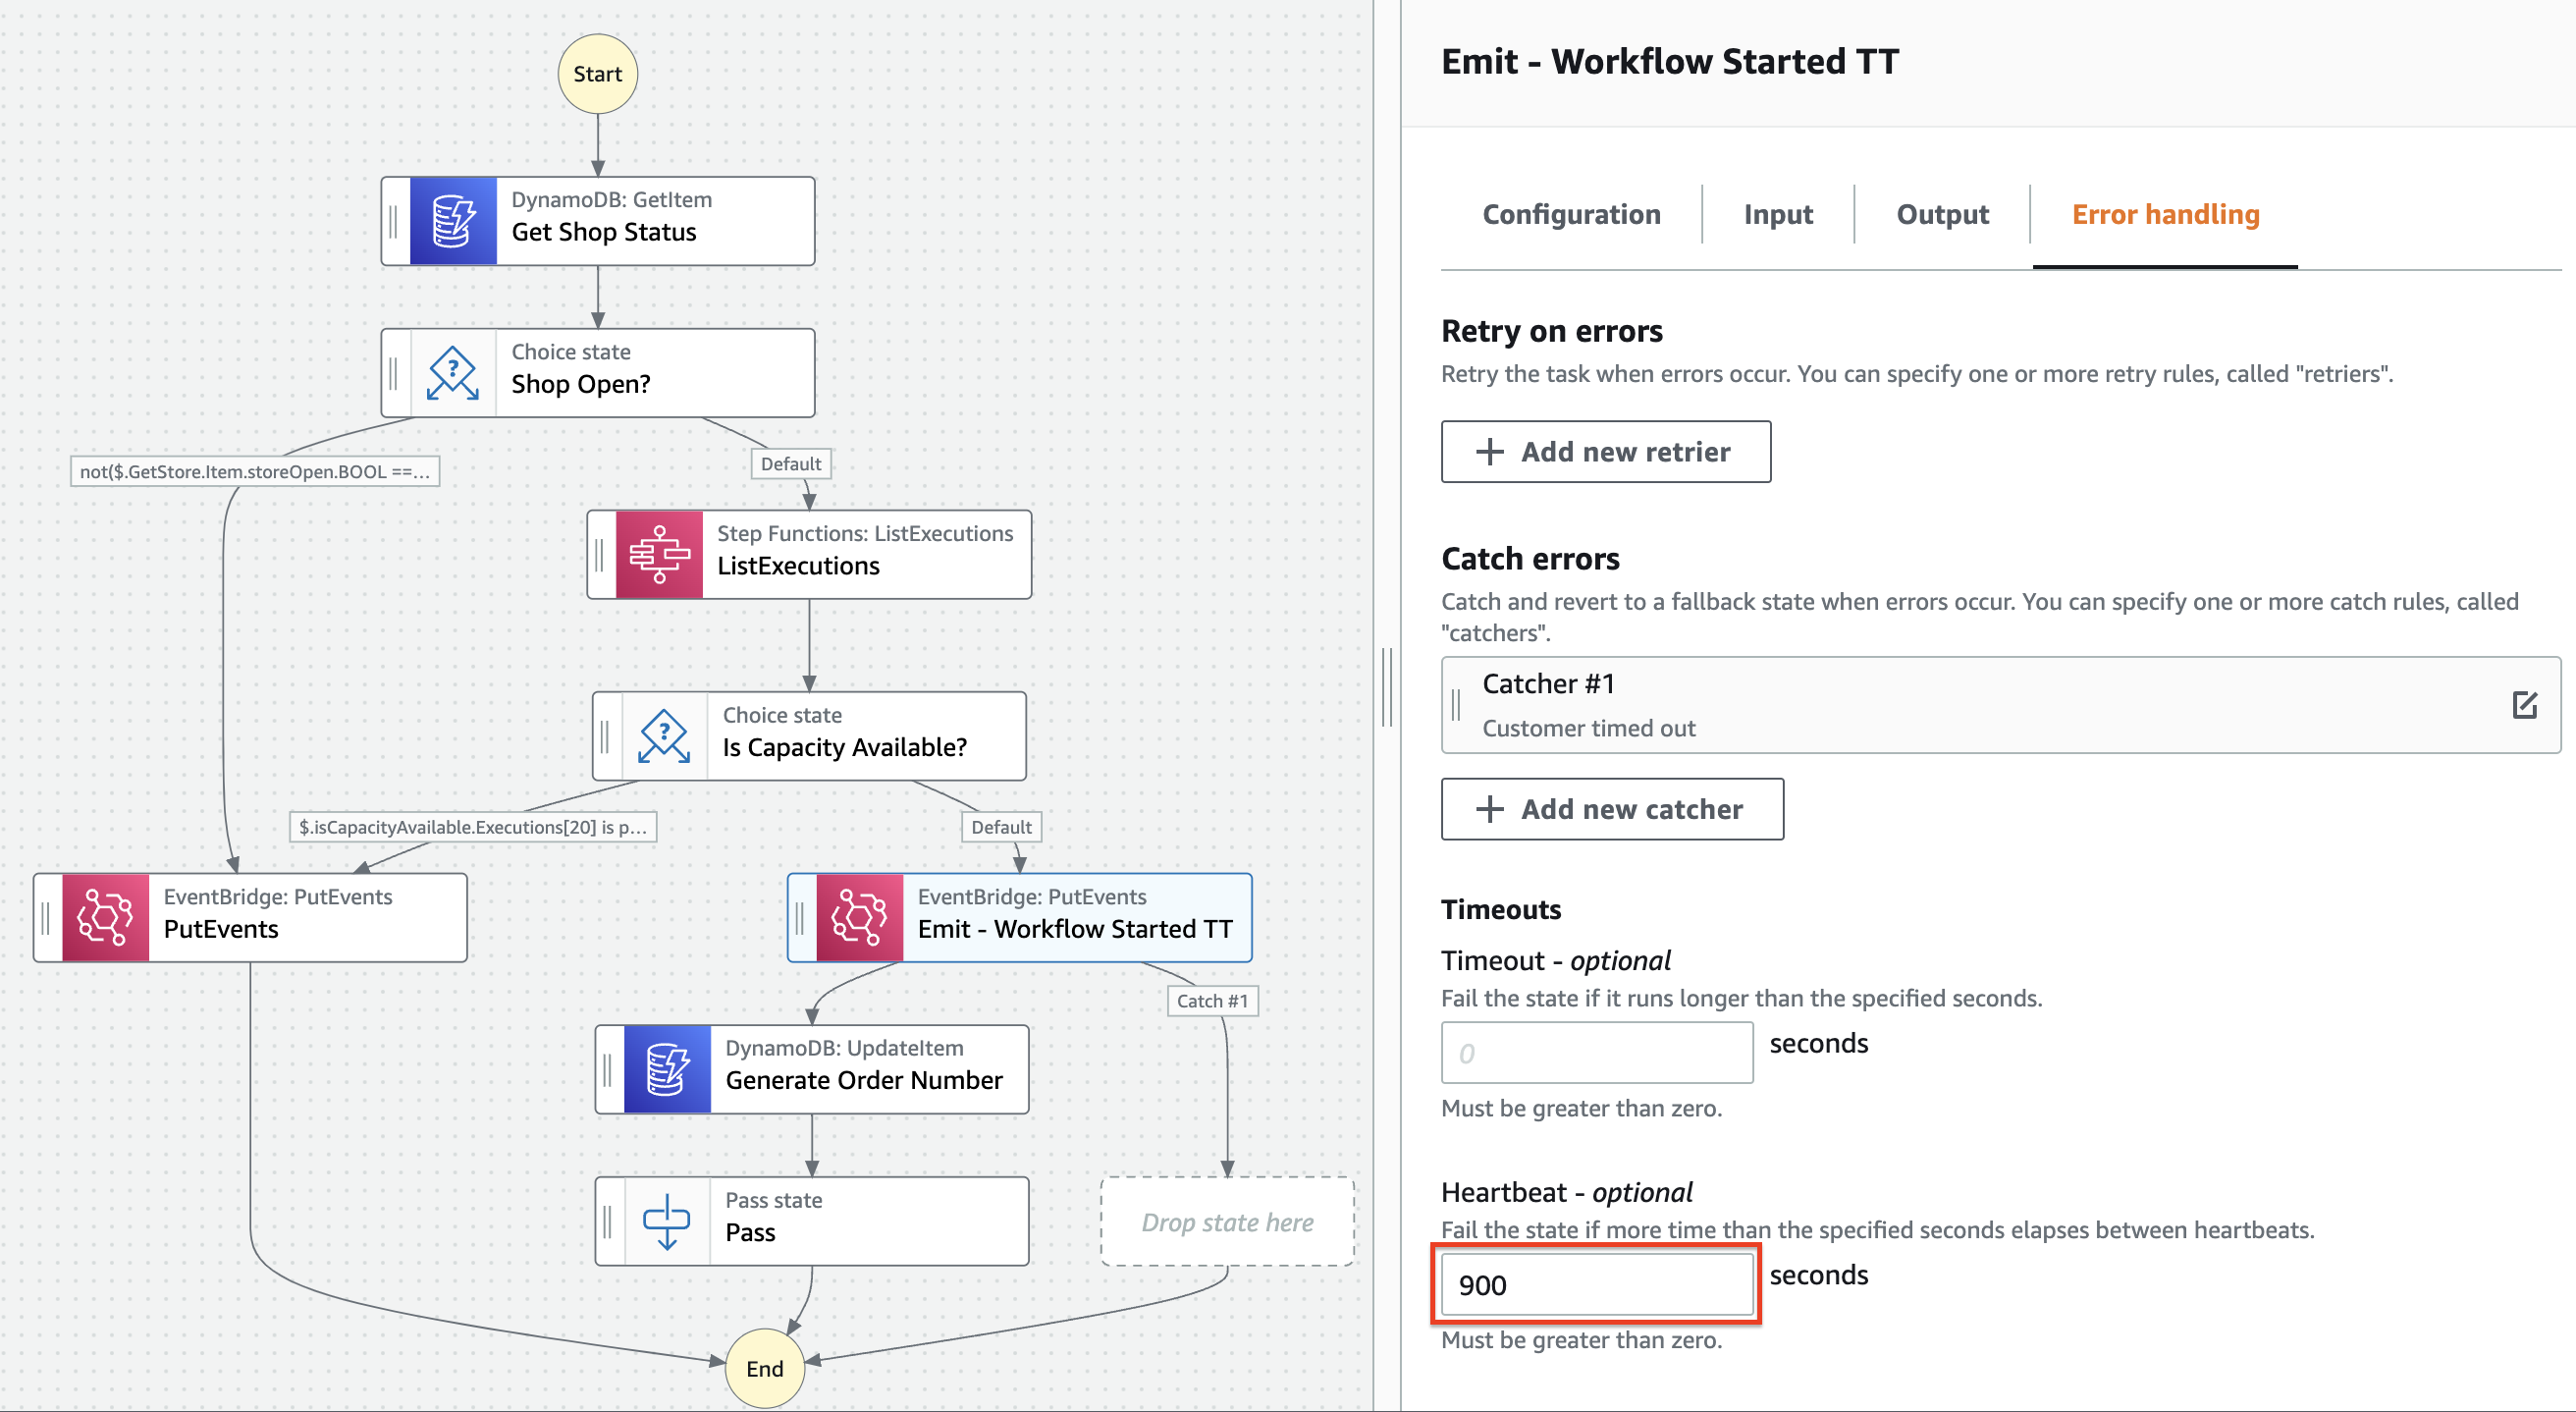
- On the Error handling tab, for Heartbeat, enter
900seconds. This means that the workflow will time out if the callback is not received within 15 minutes.
- With the Flow tab selected on the left, drag the Pass state action from the list to the empty Drop state here placeholder in the designer.
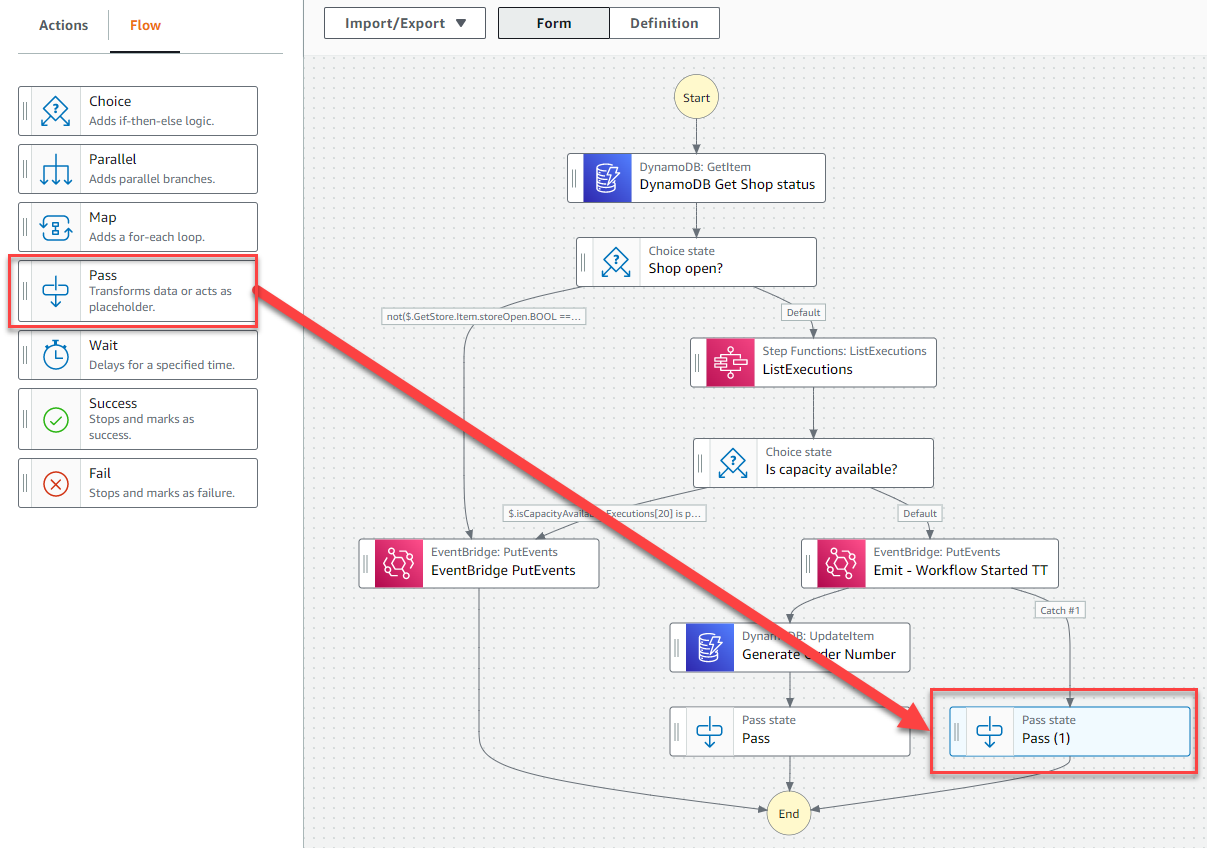
- With the state selected, the attribute panel on the right shows the configuration for this state.
- In the Configuration tab, for State Name, enter
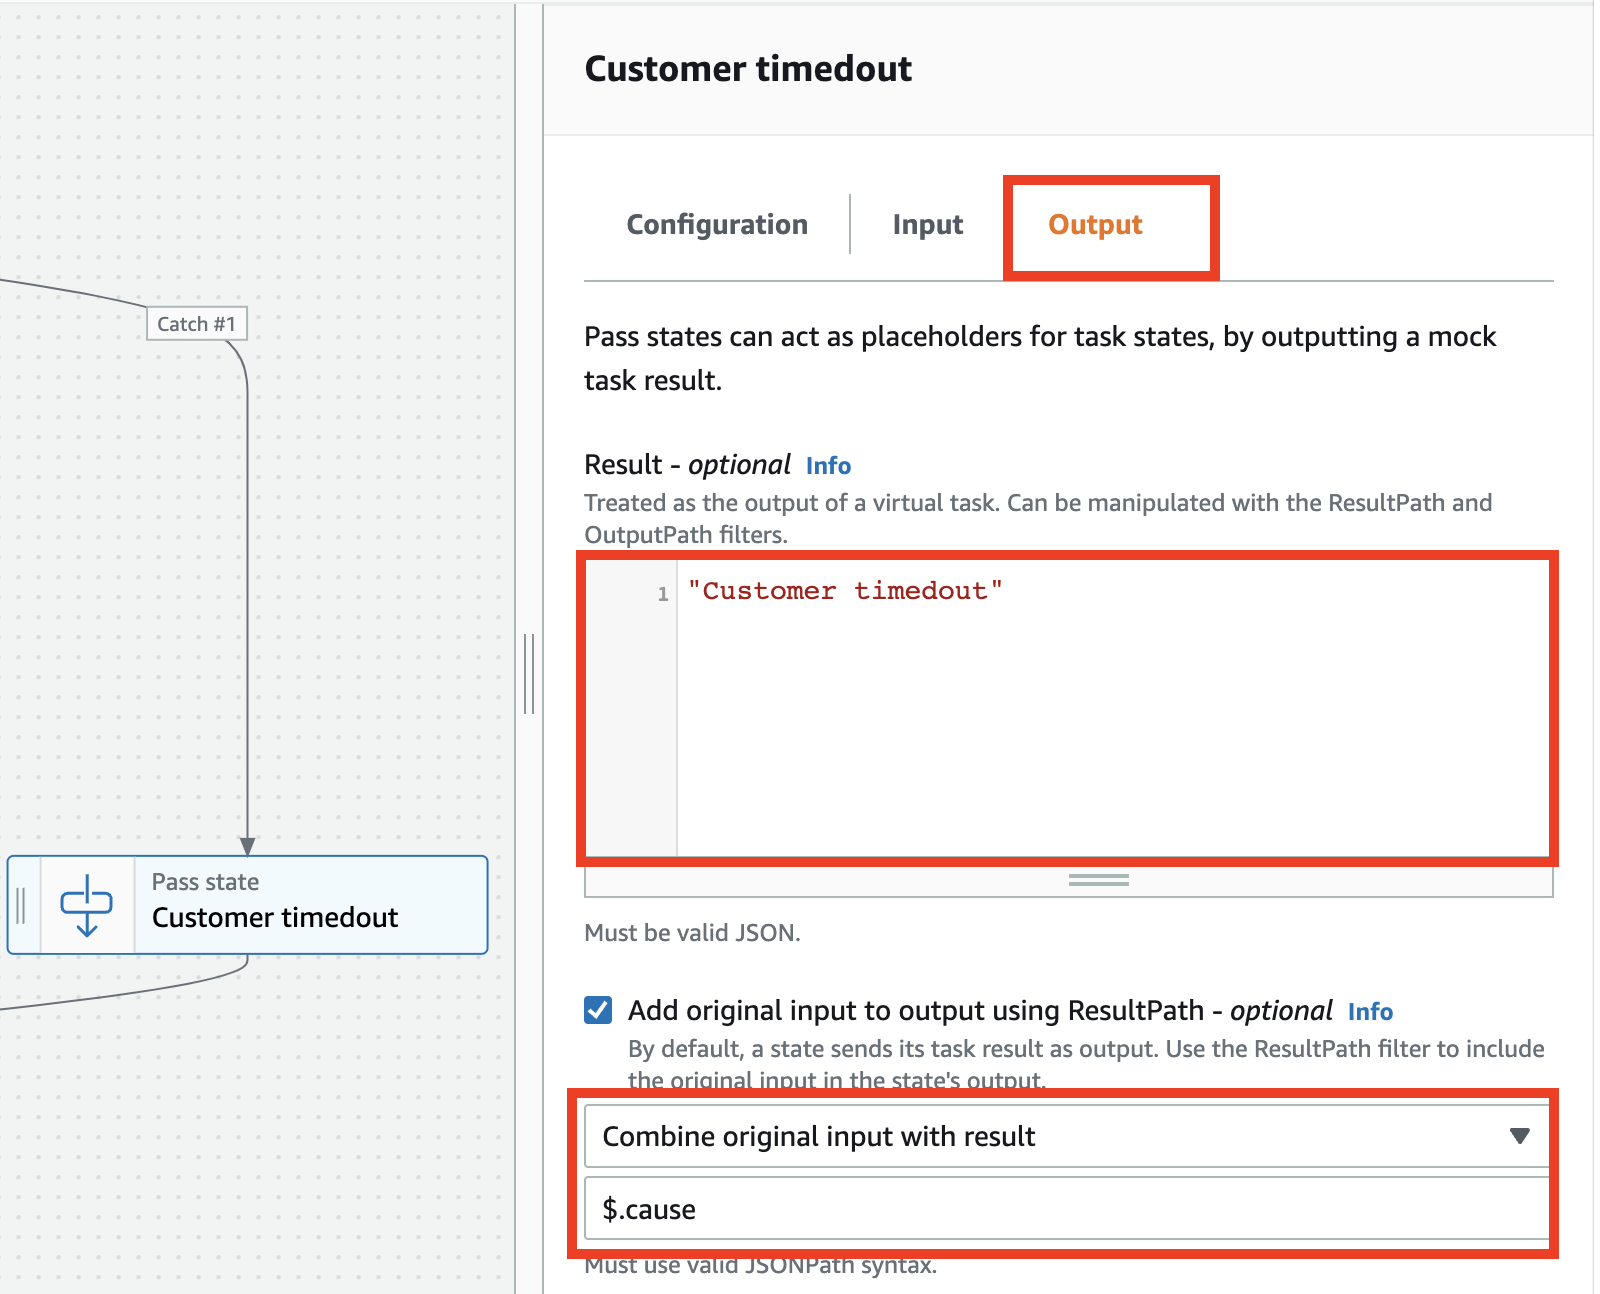
Customer timedout. - In the Output tab, for Result, enter
"Customer timedout"(including the quotes). - Select Add Original input to output using ResultPath
- In the input field enter
$.cause.
2. Adding a callback state for baristas to make an order
In this section, you add an EventBridge PutEvents state that emits an event when the callback is complete. The workflow waits here until the callback is received. This happens when the barista makes a drink order.
Step-by-step instructions
- With the Actions tab selected on the left, enter
puteventsin the search bar. Drag the Amazon EventBridge PutEvents action from the list to between the Generate Order Number and Pass states in the designer.
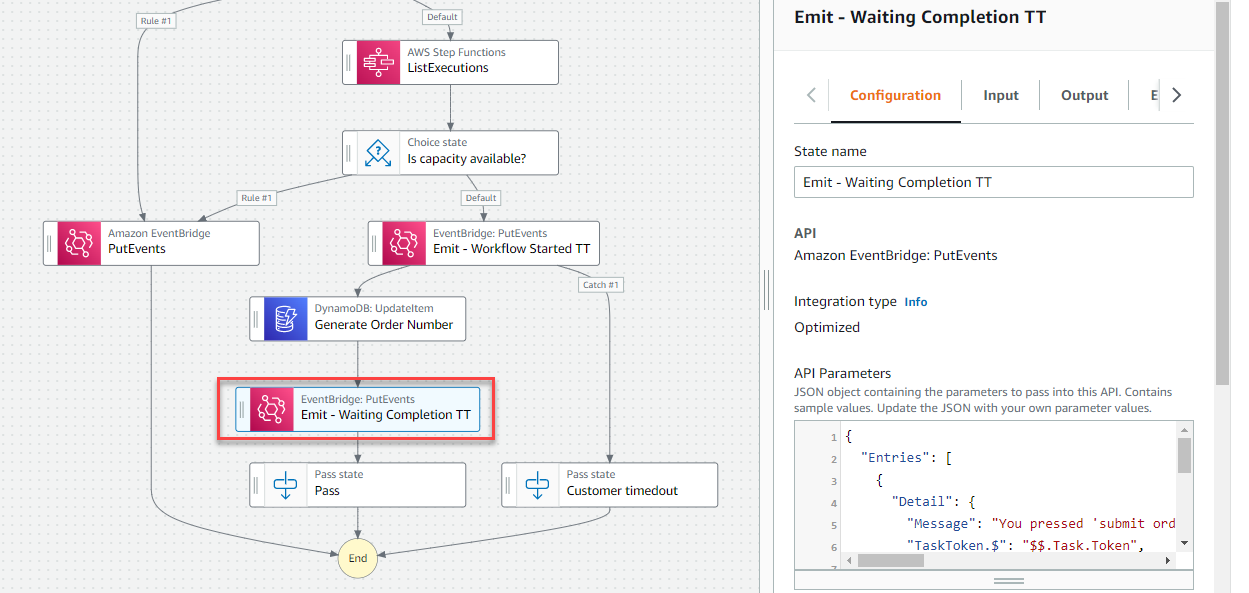
- With the state selected, the attribute panel on the right shows the configuration for this state. In the Configuration tab:
- For State name, enter Emit - Awaiting Completion TT.
- For Wait for callback, check this box.
- For API Parameters, paste the following JSON:
{
  "Entries": [
    {
      "Detail": {
        "Message": "You pressed 'submit order'. The workflow resumes using the stored 'task token', it generates your order number. It then pauses again, emitting an event with a new 'task token'.",
        "TaskToken.$": "$$.Task.Token",
        "orderId.$": "$.detail.orderId",
        "orderNumber.$": "$.Order.Payload.orderNumber",
        "userId.$": "$.detail.userId"
      },
      "DetailType": "OrderProcessor.WaitingCompletion",
      "EventBusName": "Serverlesspresso",
      "Source": "awsserverlessda.serverlesspresso"
    }
  ]
}
- Choose the Output tab. Here, you will modify the state’s output to include the result from the process that restarts the workflow (the order):
- Check the box Add original input to output using ResultPath.
- In the dropdown, select Combine original input with result.
- In the value textbox, enter
$.order.
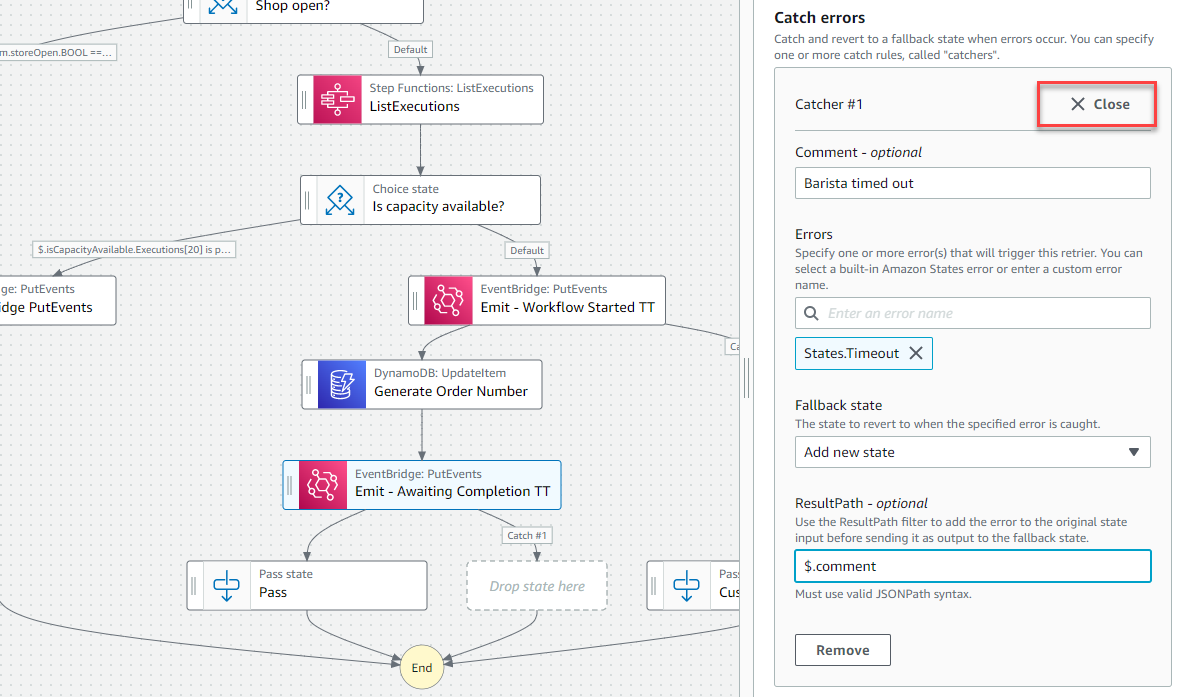
- Choose the Error handling tab. Here, you add a catch state to handle any errors. In Catch errors, choose Add new catcher.
- For Comment, enter
Barista timed out. - For Errors, select States.Timeout.
- For Fallback state, select Add new state.
- For ResultPath, enter
$.comment. - Choose Close.
-
On the Error handling tab, for Heartbeat, enter
900seconds. This means that the workflow will time out if the callback is not received within 15 minutes. -
With the Flow tab selected on the left, drag the Pass state action from the list to the empty Drop state here placeholder in the designer.
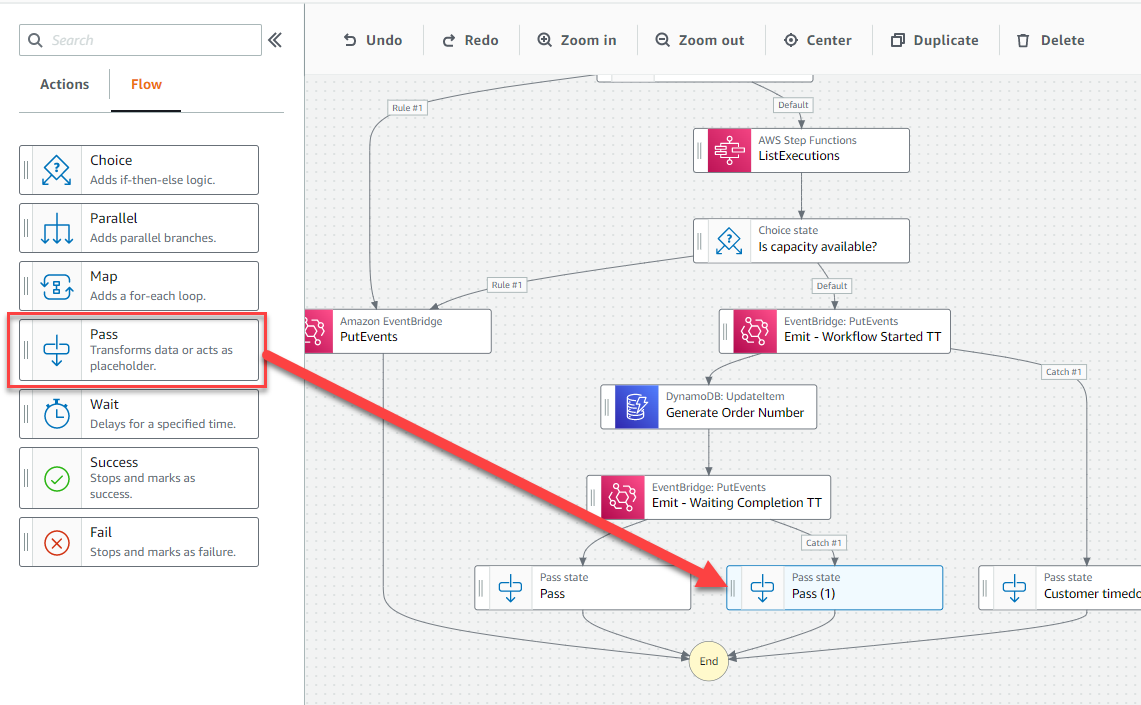
- With the state selected, the attribute panel on the right shows the configuration for this state.
- In the Configuration tab, for State Name, enter
Barista timedout. - In the Output tab, for Result, enter
"Barista timedout"(including the quotes). - Select Add Original input to output using ResultPath
- In the input field enter
$.cause.
-
Choose Apply and exit. In the Edit page, choose Save.
-
Choose Save anyway in the IAM popup.
Testing the Step Functions workflow
In this section, you will test the changes to the workflow.
Step-by-step instructions
-
From the previous section, on the page showing the new workflow, choose Start execution.
-
In the Start execution pop-up, enter the following JSON payload:
{
    "detail": {
      "orderId": "1",
      "userId": "testuser"
    }
}
-
Choose Start execution
-
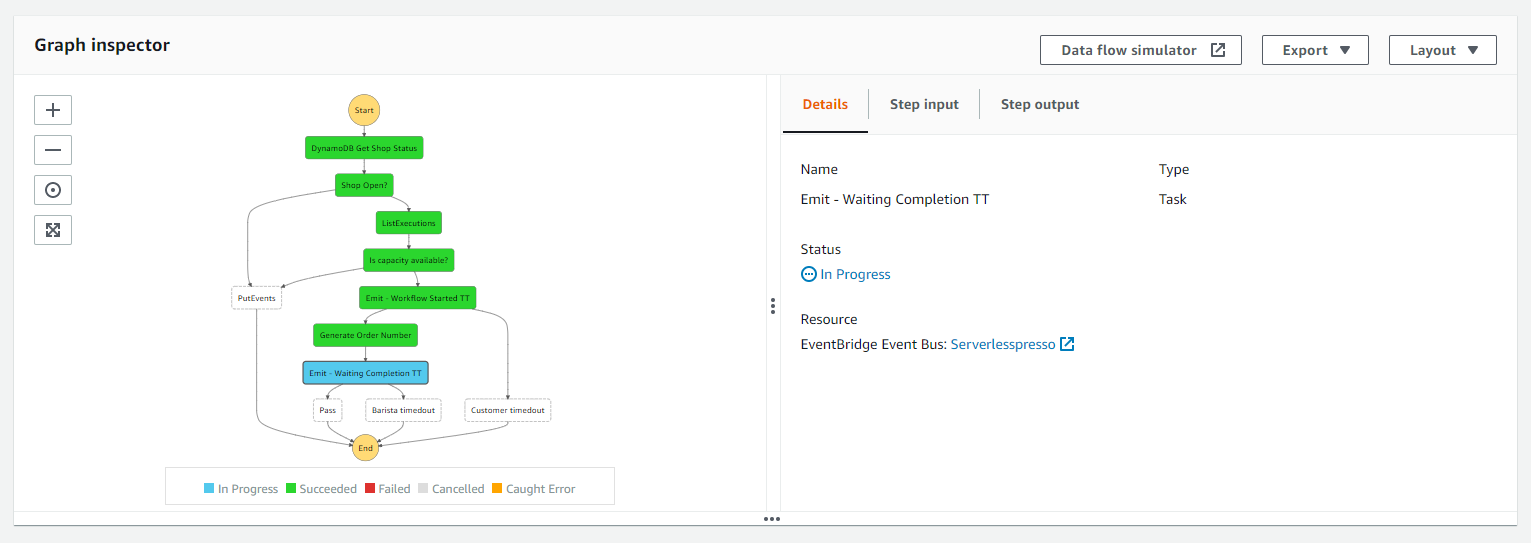
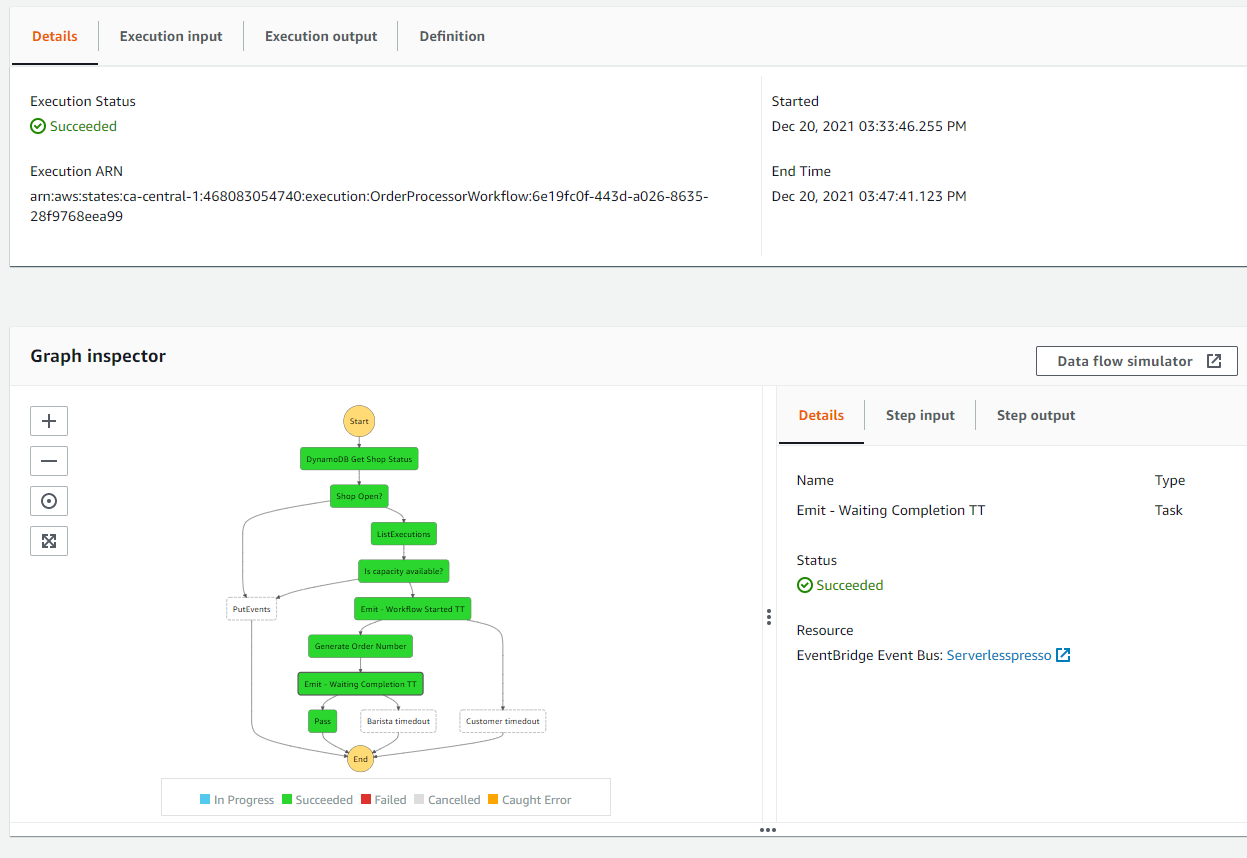
The console shows the Execution status of Running. The left side shows the flow of execution with the green states showing the actual path. The blue state shows when execution is suspended, pending a callback.
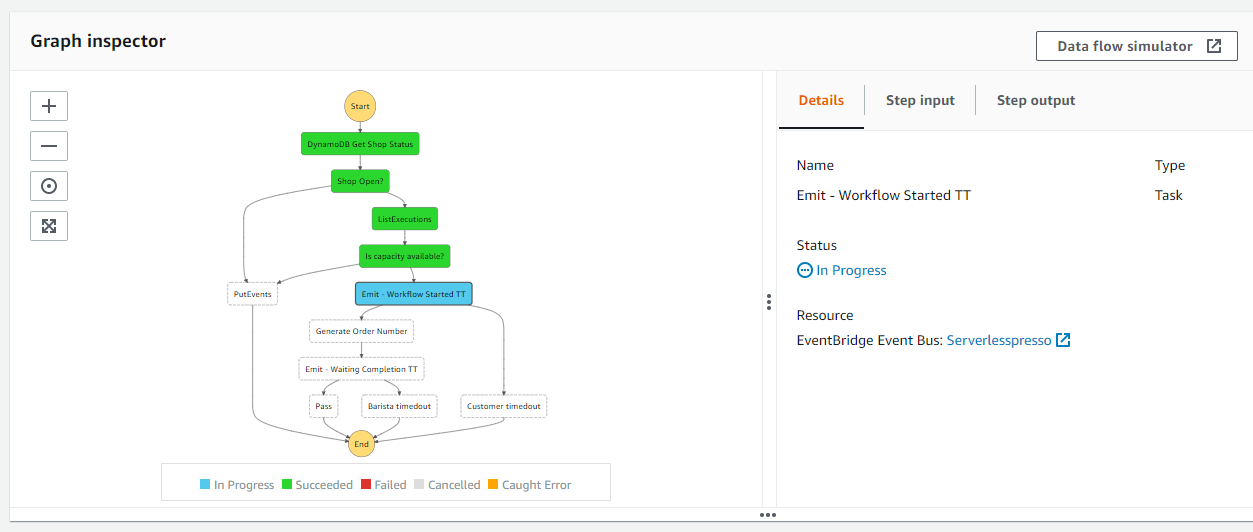
- In the Execution event history panel, open the TaskScheduled event for Emit - Workflow Started TT. This displays the payload for this event. Copy the TaskToken value to a scratch pad.
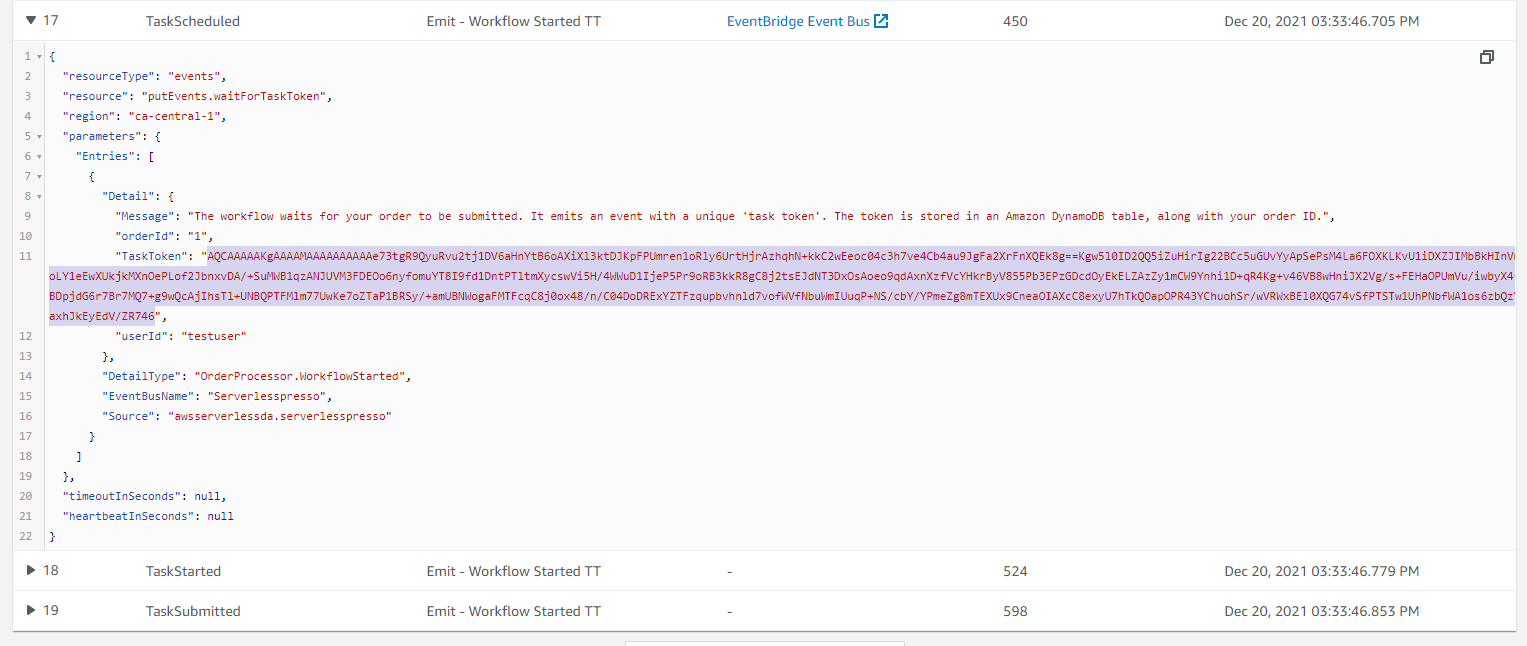
- Use the SendTaskSuccess API callback to resume the workflow with the task token and continue execution.
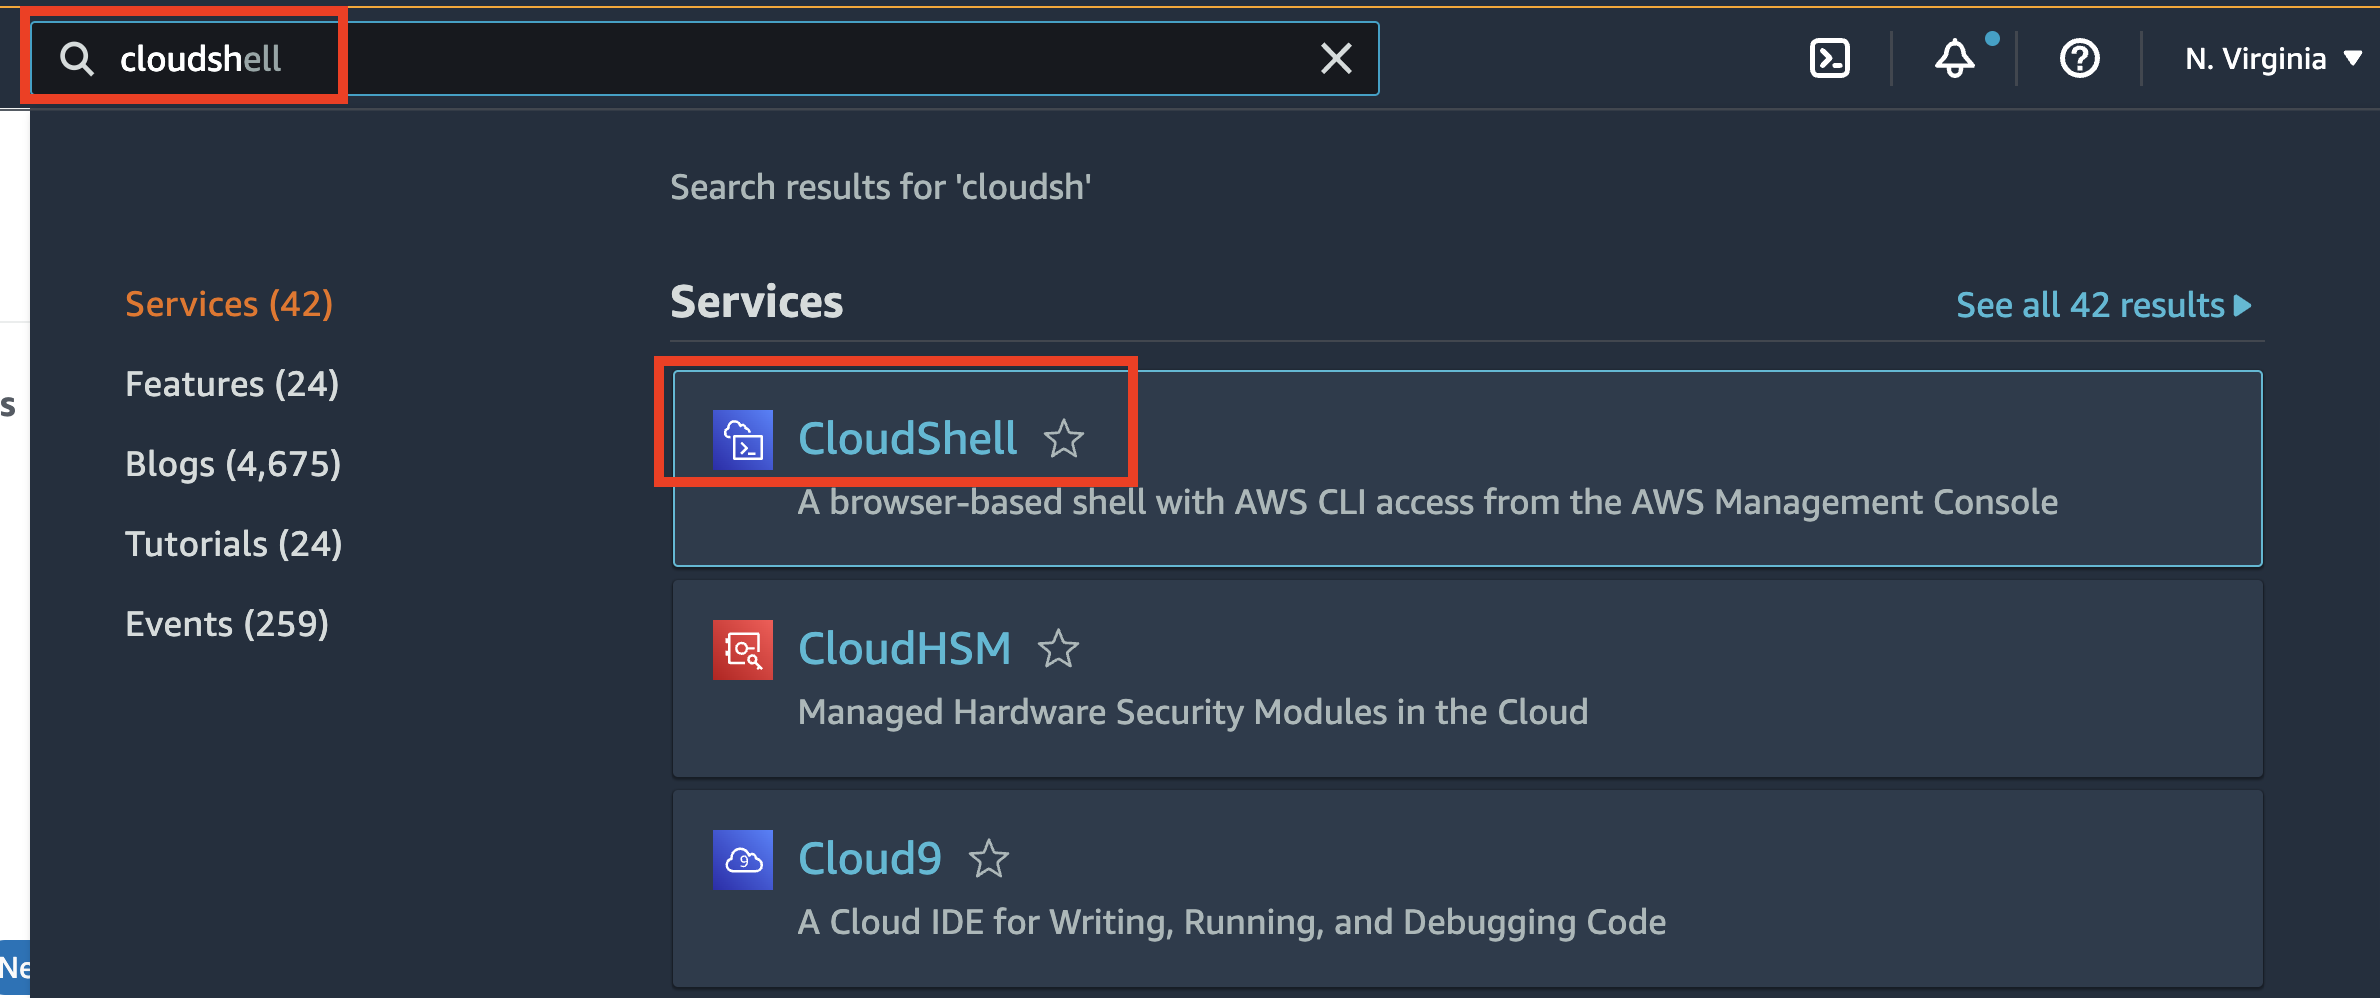
You will use a service called AWS CloudShell a browser-based shell terminal that makes it easy to securely manage, explore, and interact with your AWS resources to run the API command.
To start AWS CloudShell:
- In the Search Bar of the AWS Management Console type CloudShell, and chose CloudShell from the search options:
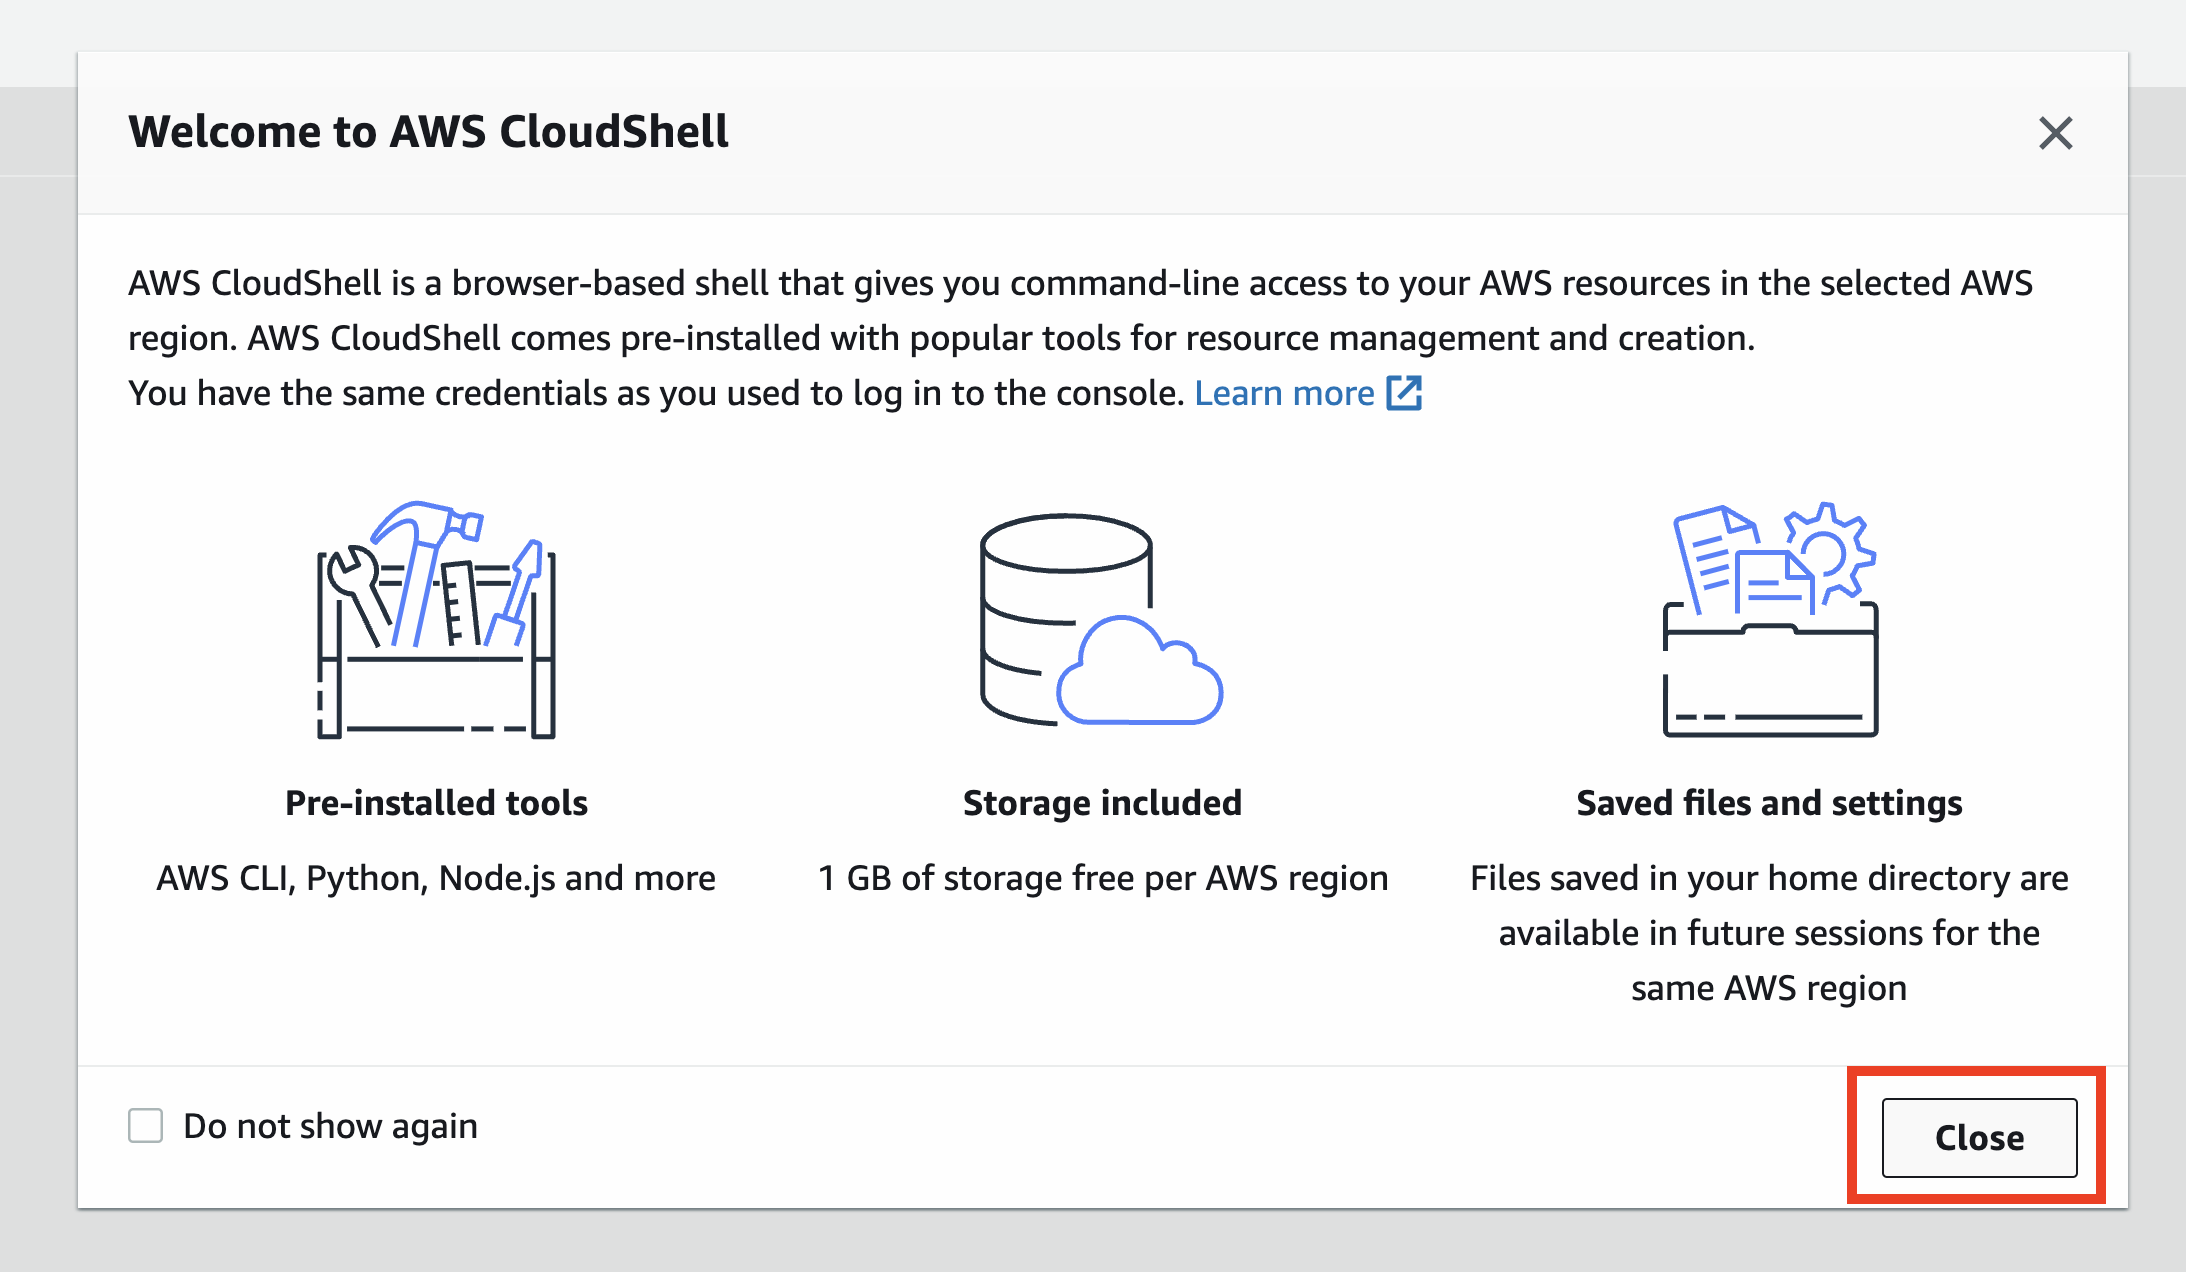
- Choose Close, to progress past the welcome alert:
- In the CloudShell terminal, enter the following command replacing
YOUR_TASK_TOKENwith the token value:
aws stepfunctions send-task-success --task-output '{"orderId":1}' --task-token YOUR_TASK_TOKEN
Execution continues to the next state waiting for a callback.
-
In the Execution event history panel, open the TaskScheduled event for Emit - Awaiting completion TT. This displays the payload for this event. Copy the TaskToken value to a scratch pad.
-
Use the SendTaskSuccess API callback to the workflow with the task token and continue execution. In the CloudShell terminal, enter the following command, replacing
YOUR_TASK_TOKENwith the token value:
aws stepfunctions send-task-success --task-output '{"orderId":1}' --task-token YOUR_TASK_TOKEN
The console shows that the execution is now finished for the workflow.
Recap
- In this section, you added state transitions that wait for a callback token before continuing. This allows the workflow to wait for the customer to place the order, and for the barista to make the drinks.
- You used the heartbeat attribute to set timeout values for each of these wait conditions.
- You tested this new feature in the console and saw how the execution waited. You then used a CLI command to return the callback token to make the execution continue.
Next steps
Next, you’ll modify the workflow to emit events when important things happen.