Testing
Overview
- You will test the workflow with the store open and closed to follow different execution paths through the workflow.
- You will test the store capacity feature by starting multiple executions and observing where the capacity exceeds what the shop can handle.
After this section, you will have a workflow that is ready to support the drink ordering application.
1. Testing the workflow with the store open
First, test the workflow with the store open, which is the default state when you run the setup module.
Step-by-step instructions
-
Go to the Step Functions console. From the AWS Management Console, select Services then select Step Functions under Application Integration. Make sure your region is correct.
-
Under State machines, select OrderProcessorWorkflow. On the page showing the workflow, choose Start execution.
-
In the Start execution pop-up, enter the following JSON payload, then choose Start execution:
{
    "detail": {
      "orderId": "1",
      "userId": "testuser"
    }
}
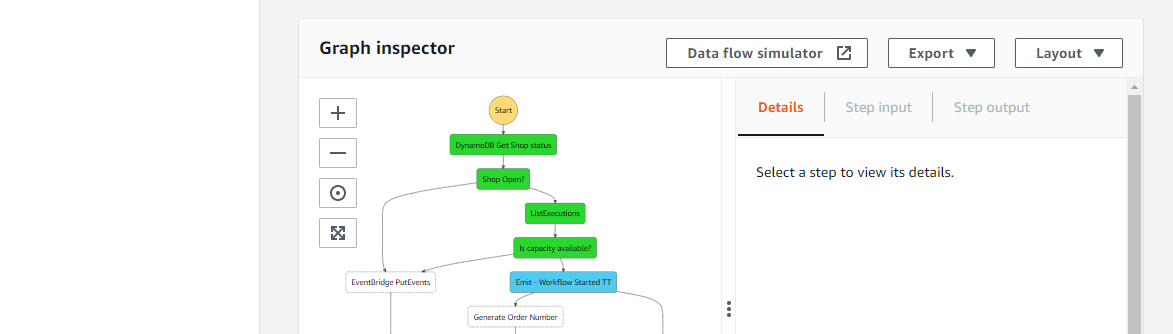
- The Graph inspector shows the workflow path taken as a result of the store being open.
2. Testing the workflow with the store closed
The shop’s state is stored in the DynamoDB configuration table for the application. The Is the shop open? transition checks this value and uses a Step Functions choice state to determine the flow. Here, you will toggle this state and run executions to test the outcome.
Step-by-step instructions
-
Go to the DynamoDB console. From the AWS Management Console, select Services then select DynamoDB under Database. Make sure your region is correct.
-
From the left-hand menu, choose Explore items in the Tables menu. Choose serverlesspresso-config-table in the Tables list.

- Choose the config item in the Items returned panel. This opens the item editor. Choose JSON and disable View DynamoDB JSON.
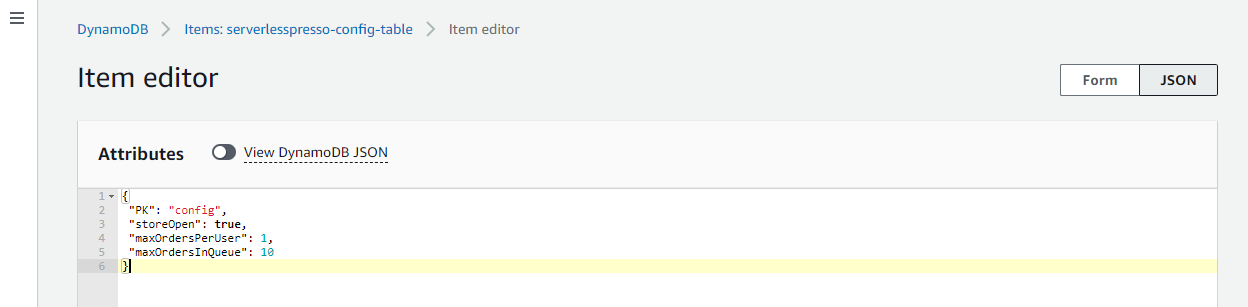
- Set the store to open. Paste the following JSON, which sets
storeOpentofalse.
{
 "PK": "config",
 "storeOpen": false,
 "maxOrdersPerUser": 1,
 "maxOrdersInQueue": 10
}
-
Choose Save changes to update the table.
-
Go to the Step Functions console. From the AWS Management Console, select Services then select Step Functions under Application Integration. Make sure your region is correct.
-
Under State machines, select OrderProcessorWorkflow. On the page showing the workflow, choose Start execution.
-
In the Start execution pop-up, enter the following JSON payload, then choose Start execution:
{
    "detail": {
      "orderId": "1",
      "userId": "testuser"
    }
}
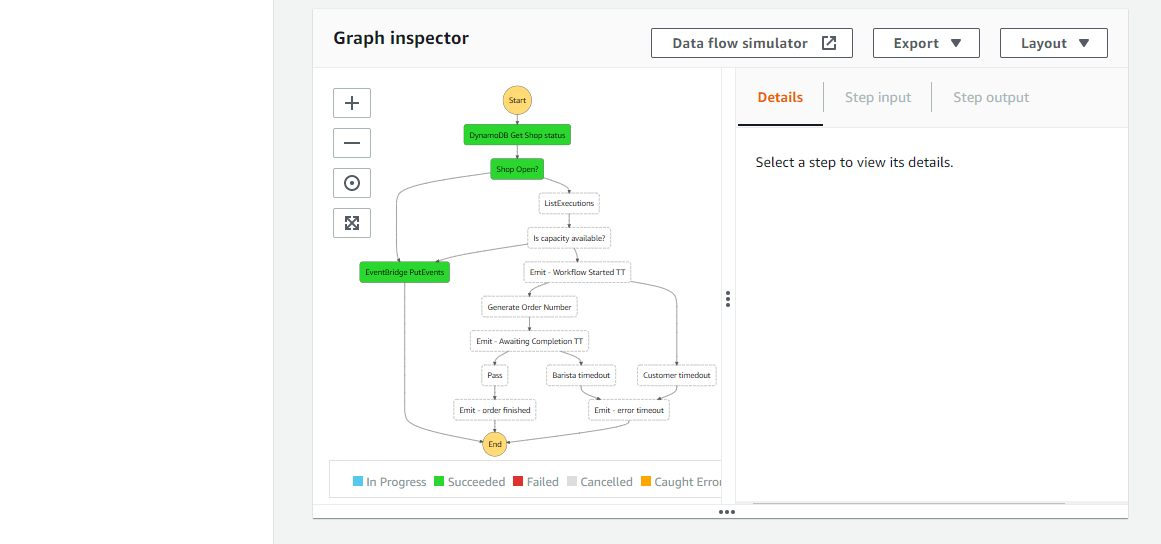
- The Graph inspector shows the workflow path taken as a result of the store being closed.
- The execution has ended. In the Execution event history panel, expand the event with the type TaskScheduled for the step EventBridge PutEvents.
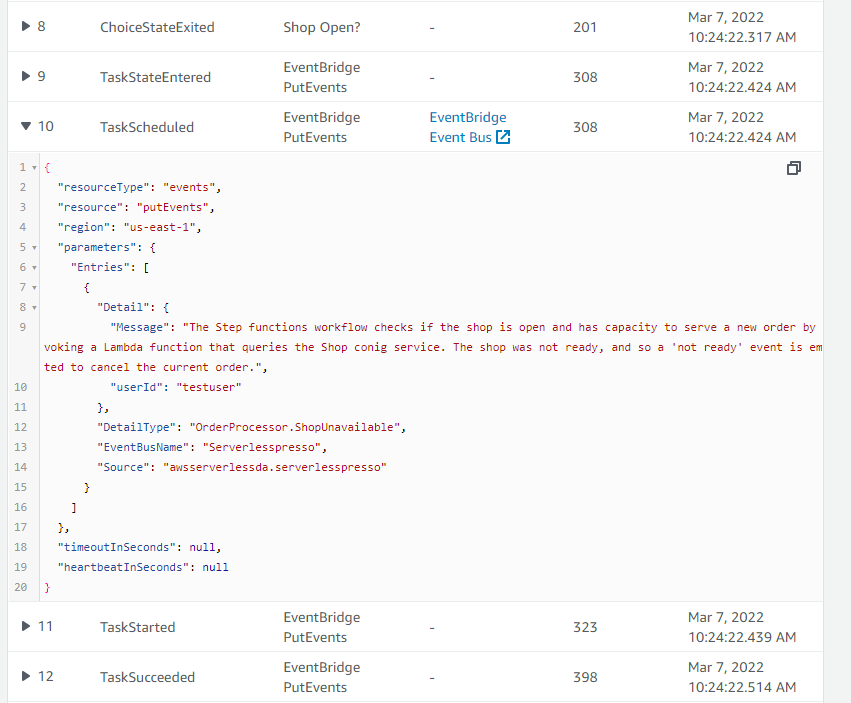
The workflow has emitted an event indicating that the shop is unavailable. This can be consumed by other microservices in the application to take appropriate actions.
-
Set the store back to “open” in the DynamoDB table. 1. Go to the DynamoDB console. From the AWS Management Console, select Services then select DynamoDB under Database. Make sure your region is correct.
-
From the left-hand menu, choose Explore items in the Tables menu. Choose serverlesspresso-config-table in the Tables list.
-
Choose the config item in the Items returned panel. This opens the item editor.
-
Set the store back to open. Paste the following JSON, which sets
storeOpentotrue.
{
 "PK": "config",
 "storeOpen": true,
 "maxOrdersPerUser": 1,
 "maxOrdersInQueue": 10
}
- Choose Save changes to update the table.
Recap
- You tested how the workflow responds, depending on if the store is open or closed. Congratulations, you’ve now configured the workflow for the application!
Next steps
Next, you will set up and configure events that allow other microservices to react to changes in this workflow.