Is there capacity?
Overview
- You will modify the workflow to check if the queue at the coffee shop has capacity to accept another order.
- To do this, you will add a state that checks if the total number of open workflows is higher than a configurable maximum.
- You will test the new workflow and see the input and output payloads.
After this section, you will have a workflow that runs if there is capacity available.
Listing the active executions of the workflow
In this section, you use an AWS SDK integration in Step Functions to query the service.
Step-by-step instructions
-
Go to the Step Functions console. From the AWS Management Console, select Services then select Step Functions under Application Integration. Make sure your region is correct.
-
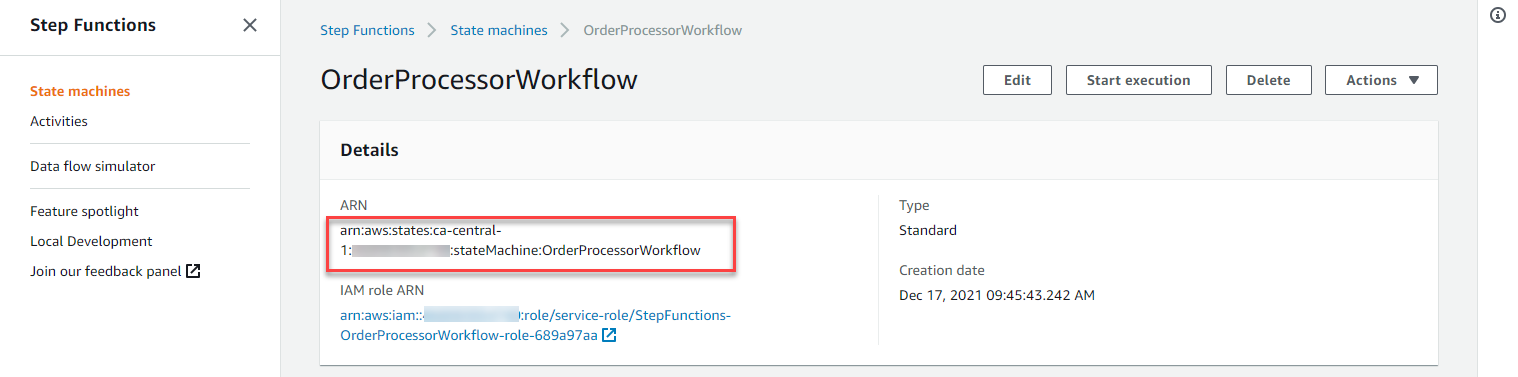
From the left-hand menu, select State machine and choose OrderProcessorWorkflow from the list. Copy the ARN value to a scratchpad - you will need this value later. Choose Edit.
-
On the next page, choose Workflow Studio to open the workflow in the designer.
-
With the Actions tab selected on the left, enter
listexecutionsin the search bar. Drag the AWS Step Functions ListExecutions action from the list to between the Shop Open? and Pass states in the designer.
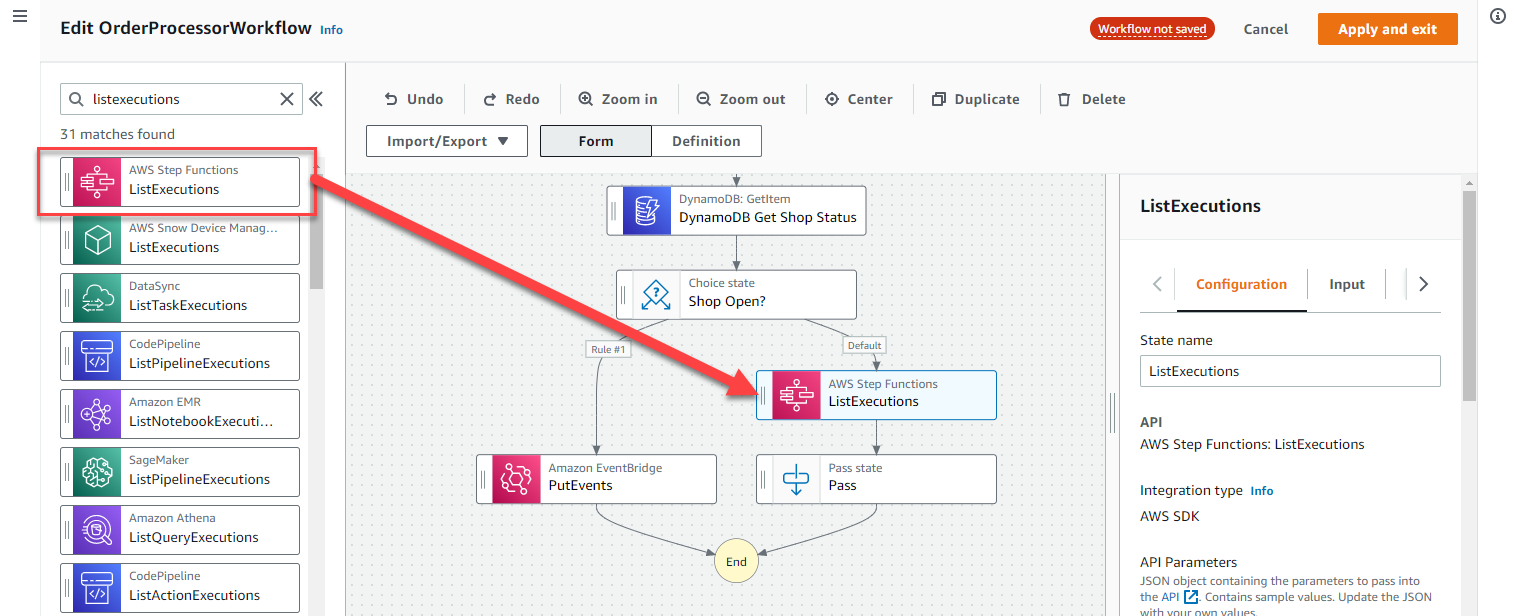
- With the state selected, the attribute panel on the right shows the configuration for this state. In the Configuration tab:
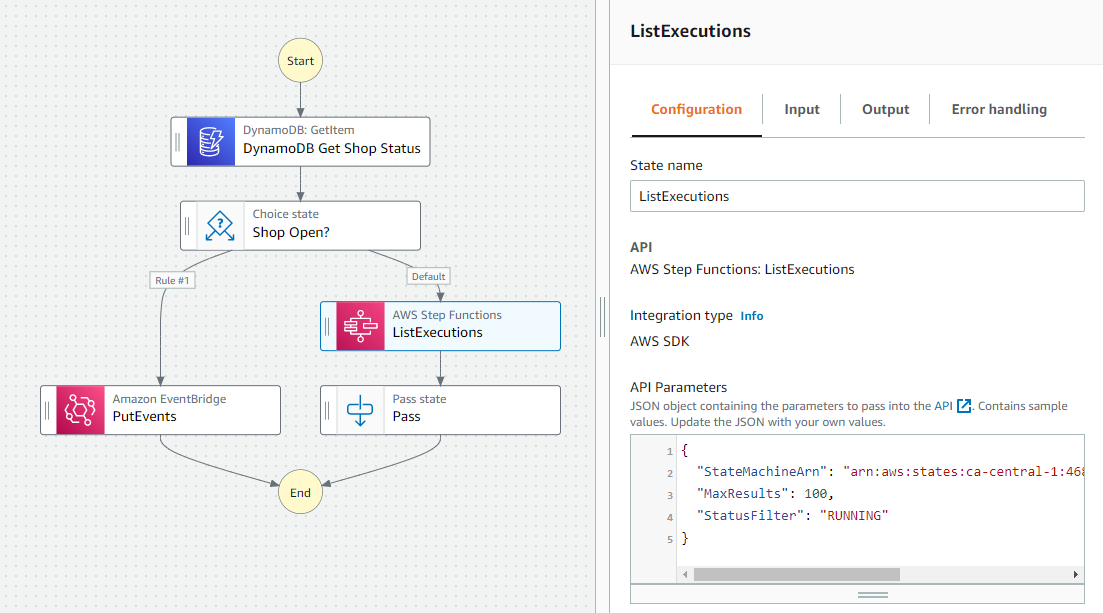
- For State name, enter
ListExecutions. - For API Parameters, paste the following JSON, replacing
YOUR_STATE_MACHINE_ARNwith the ARN you copied earlier.
{
  "StateMachineArn": "YOUR_STATE_MACHINE_ARN",
  "MaxResults": 100,
  "StatusFilter": "RUNNING"
}
Check you Replaced YOUR_STATE_MACHINE_ARN with the correct ARN.
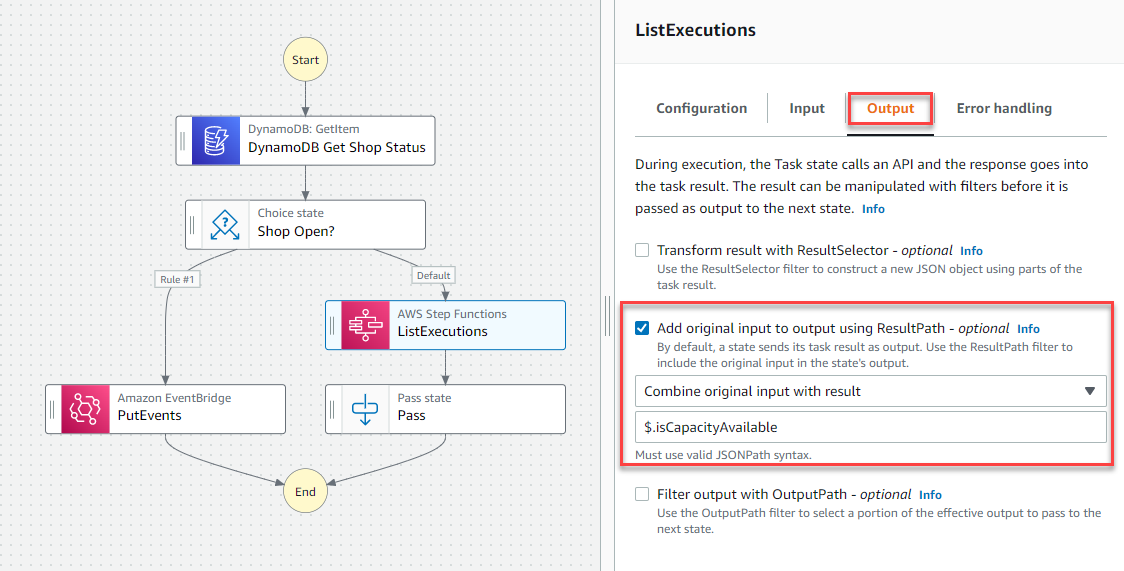
- Choose the Output tab. Here, you will modify the state’s output to include the result from the SDK call:
- Check the box Add original input to output using ResultPath.
- Ensure Combine original input with result is selected in the dropdown, then enter
$.isCapacityAvailablein the value textbox.
Adding branching logic
The workflow must branch logic depending on the value returned by the ListExecutions SDK call. In this section, you add the branching logic.
Step-by-step instructions
- From the Flow tab, drag the Choice state to under the ListExecutions state.
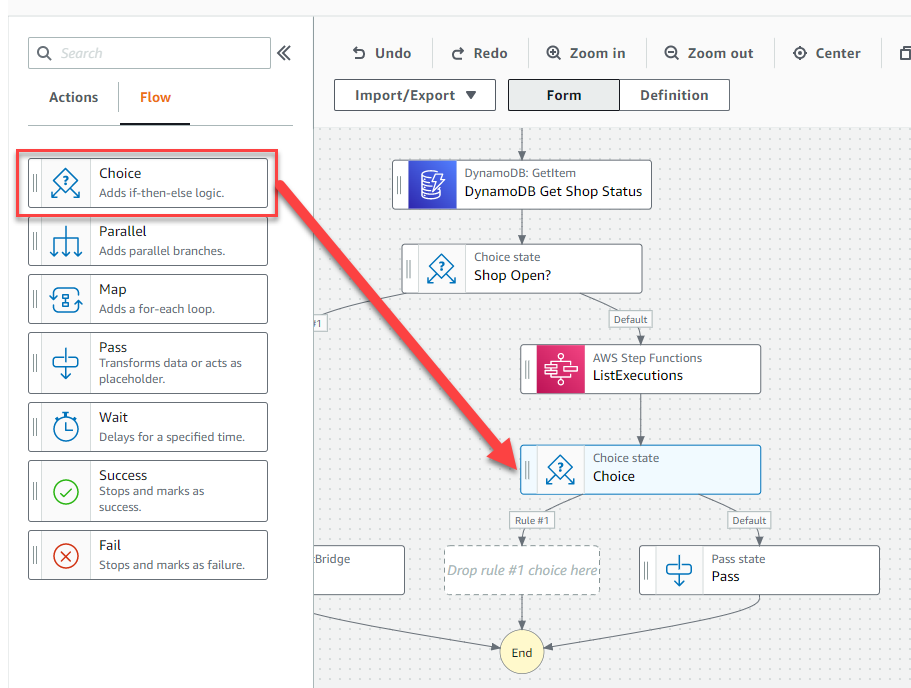
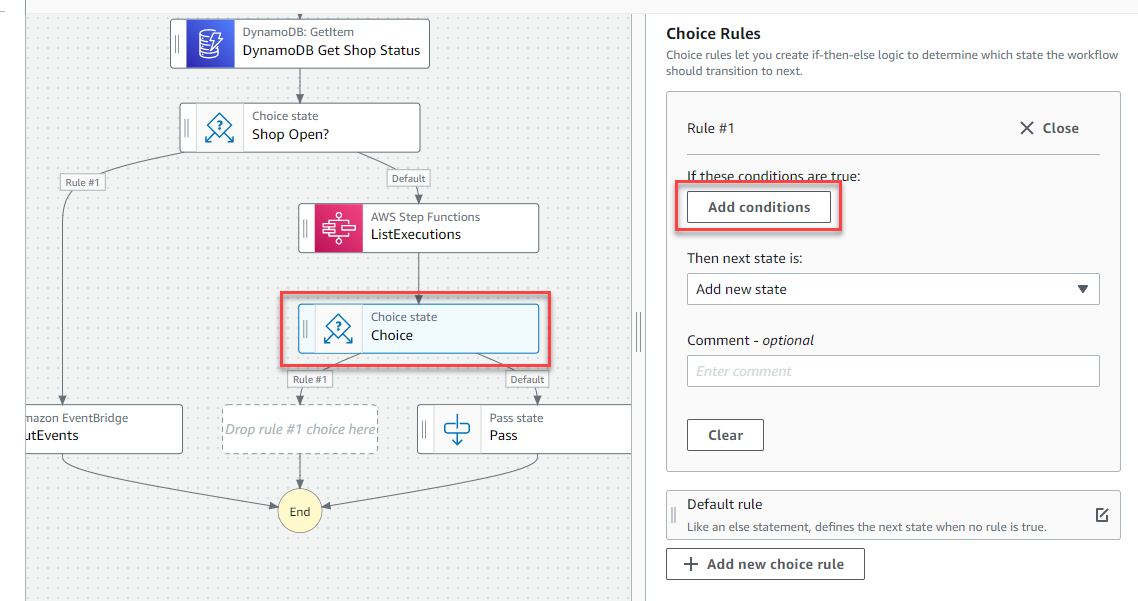
- You have now defined a logic branch. Next, define the decision logic in the choice state. Click on the choice state to open its attributes in the right side panel. For Rule #1, click on the edit icon. Choose Add conditions.
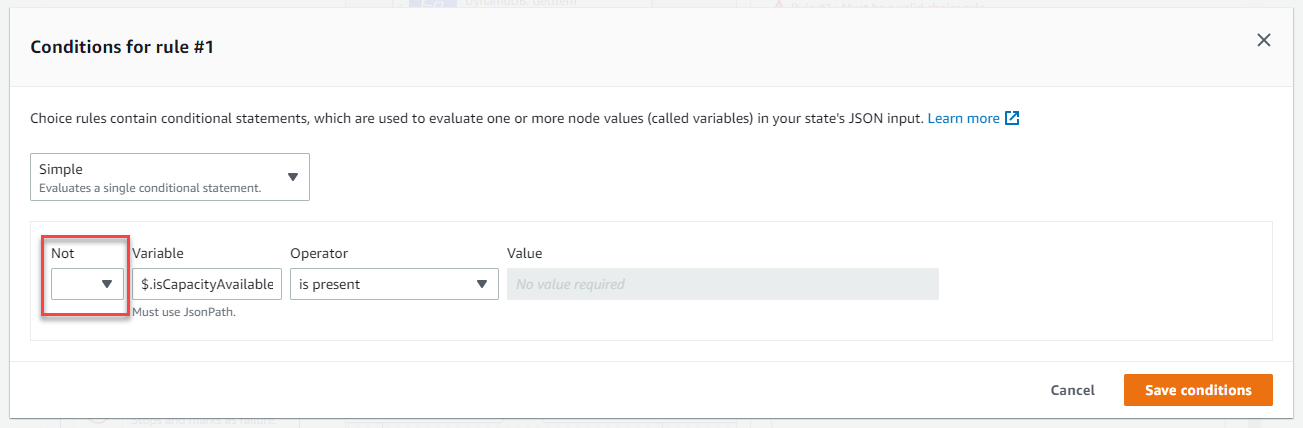
- In the Conditions for rule #1 panel, specify the rule that will determine if the store is closed:
- For Not, leave blank in the dropdown.
- For Variable, enter
$.isCapacityAvailable.Executions[20]. - For Operator, select is present.
- For Value, select true.
- Choose Save conditions.
Double-check that the NOT dropdown is blank before continuing
- Change Then next state is to EventBridge PutEvents. Choose Close.
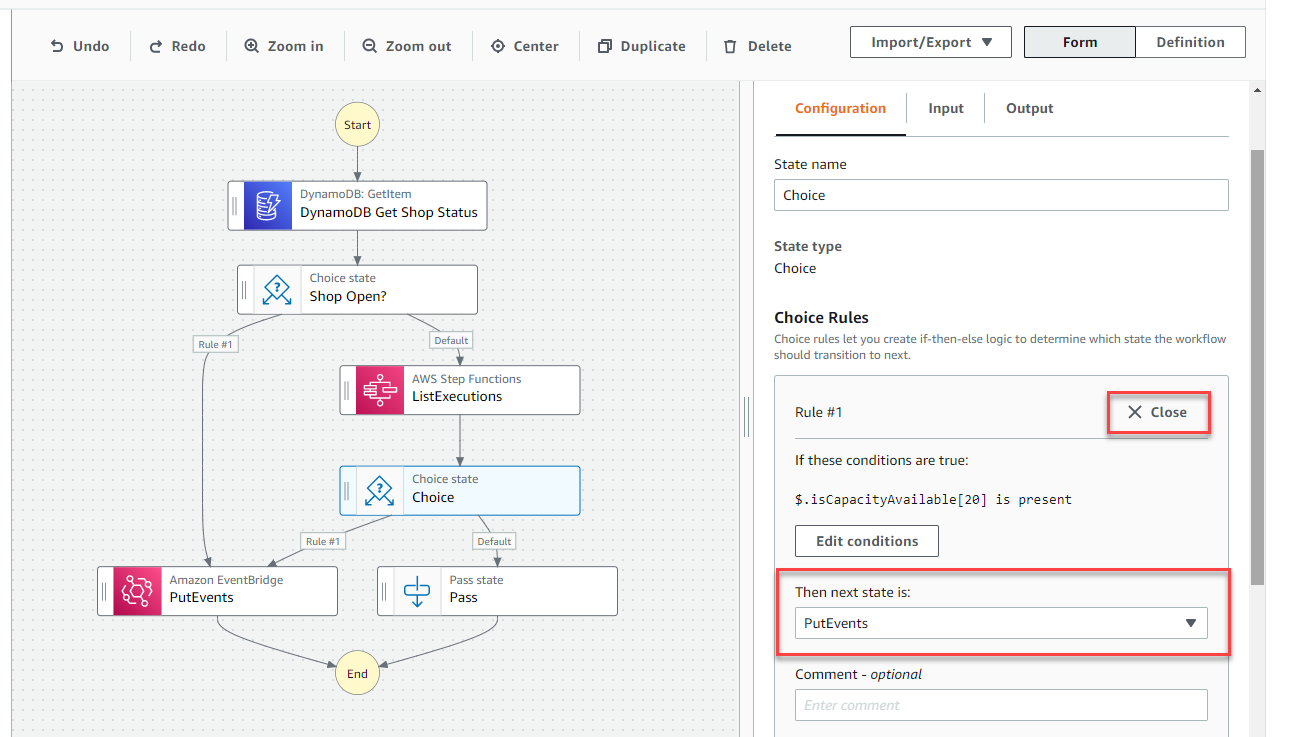
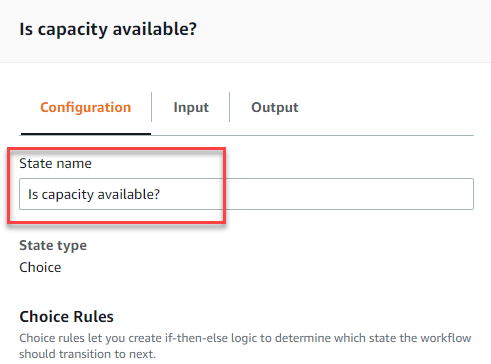
- For State name, enter
Is capacity available?.
- Check the Amazon States Language (ASL) definition by choosing the Definition toggle button above the designer. The ASL appears as:
{
  "Comment": "A description of my state machine",
  "StartAt": "DynamoDB Get Shop Status",
  "States": {
    "DynamoDB Get Shop Status": {
      "Type": "Task",
      "Resource": "arn:aws:states:::dynamodb:getItem",
      "Parameters": {
        "TableName": "serverlesspresso-config-table",
        "Key": {
          "PK": {
            "S": "config"
          }
        }
      },
      "ResultPath": "$.GetStore",
      "Next": "Shop Open?"
    },
    "Shop Open?": {
      "Type": "Choice",
      "Choices": [
        {
          "Not": {
            "Variable": "$.GetStore.Item.storeOpen.BOOL",
            "BooleanEquals": true
          },
          "Next": "PutEvents"
        }
      ],
      "Default": "ListExecutions"
    },
    "ListExecutions": {
      "Type": "Task",
      "Next": "Is capacity available?",
      "Parameters": {
        "StateMachineArn": "YOUR_STATE_MACHINE_ARN",
        "MaxResults": 100,
        "StatusFilter": "RUNNING"
      },
      "Resource": "arn:aws:states:::aws-sdk:sfn:listExecutions",
      "ResultPath": "$.isCapacityAvailable"
    },
    "Is capacity available?": {
      "Type": "Choice",
      "Choices": [
        {
          "Variable": "$.isCapacityAvailable.Executions[20]",
          "IsPresent": true,
          "Next": "PutEvents"
        }
      ],
      "Default": "Pass"
    },
    "PutEvents": {
      "Type": "Task",
      "End": true,
      "Parameters": {
        "Entries": [
          {}
        ]
      },
      "Resource": "arn:aws:states:::aws-sdk:eventbridge:putEvents"
    },
    "Pass": {
      "Type": "Pass",
      "End": true
    }
  }
}
-
Choose Apply and exit.
-
In the Edit OrderProcessorWorkflow page, choose Save.
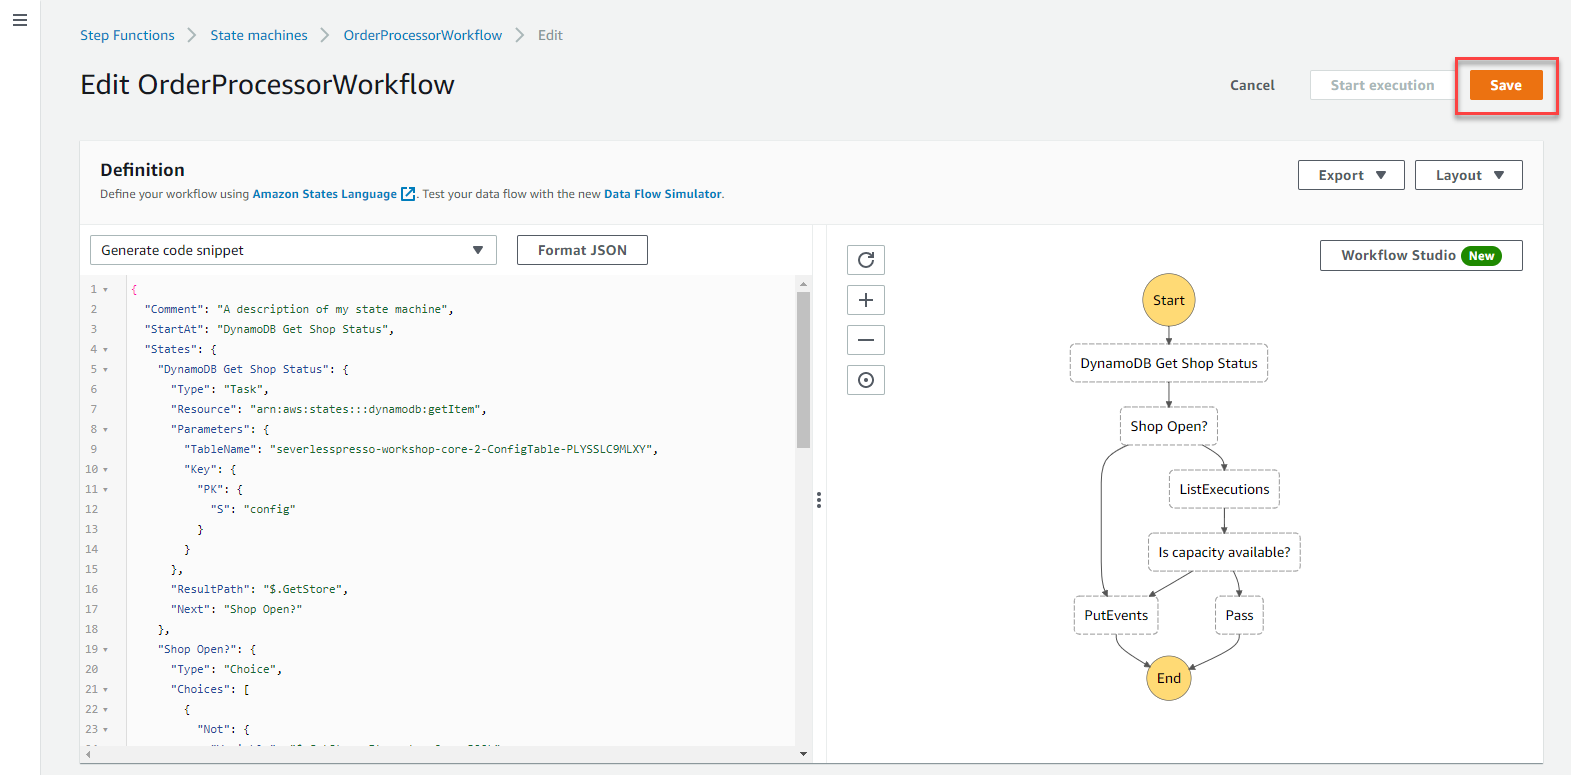
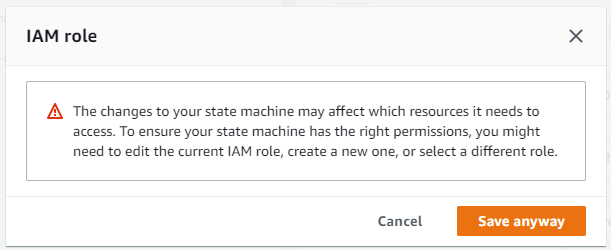
- In the IAM role popup, choose Save anyway. The IAM role you are using was deployed in the setup module and has the necessary permissions.
Testing the Step Functions workflow
In this section, you will test the changes to the workflow.
Step-by-step instructions
-
From the previous section, on the page showing the new workflow, choose Start execution. In the Start execution pop-up, choose Start execution.
-
After the execution is finished, the console shows a results page. The left side shows the flow of execution with the green states showing the actual path. Choose the Is capacity available? status to show the details on the right side.
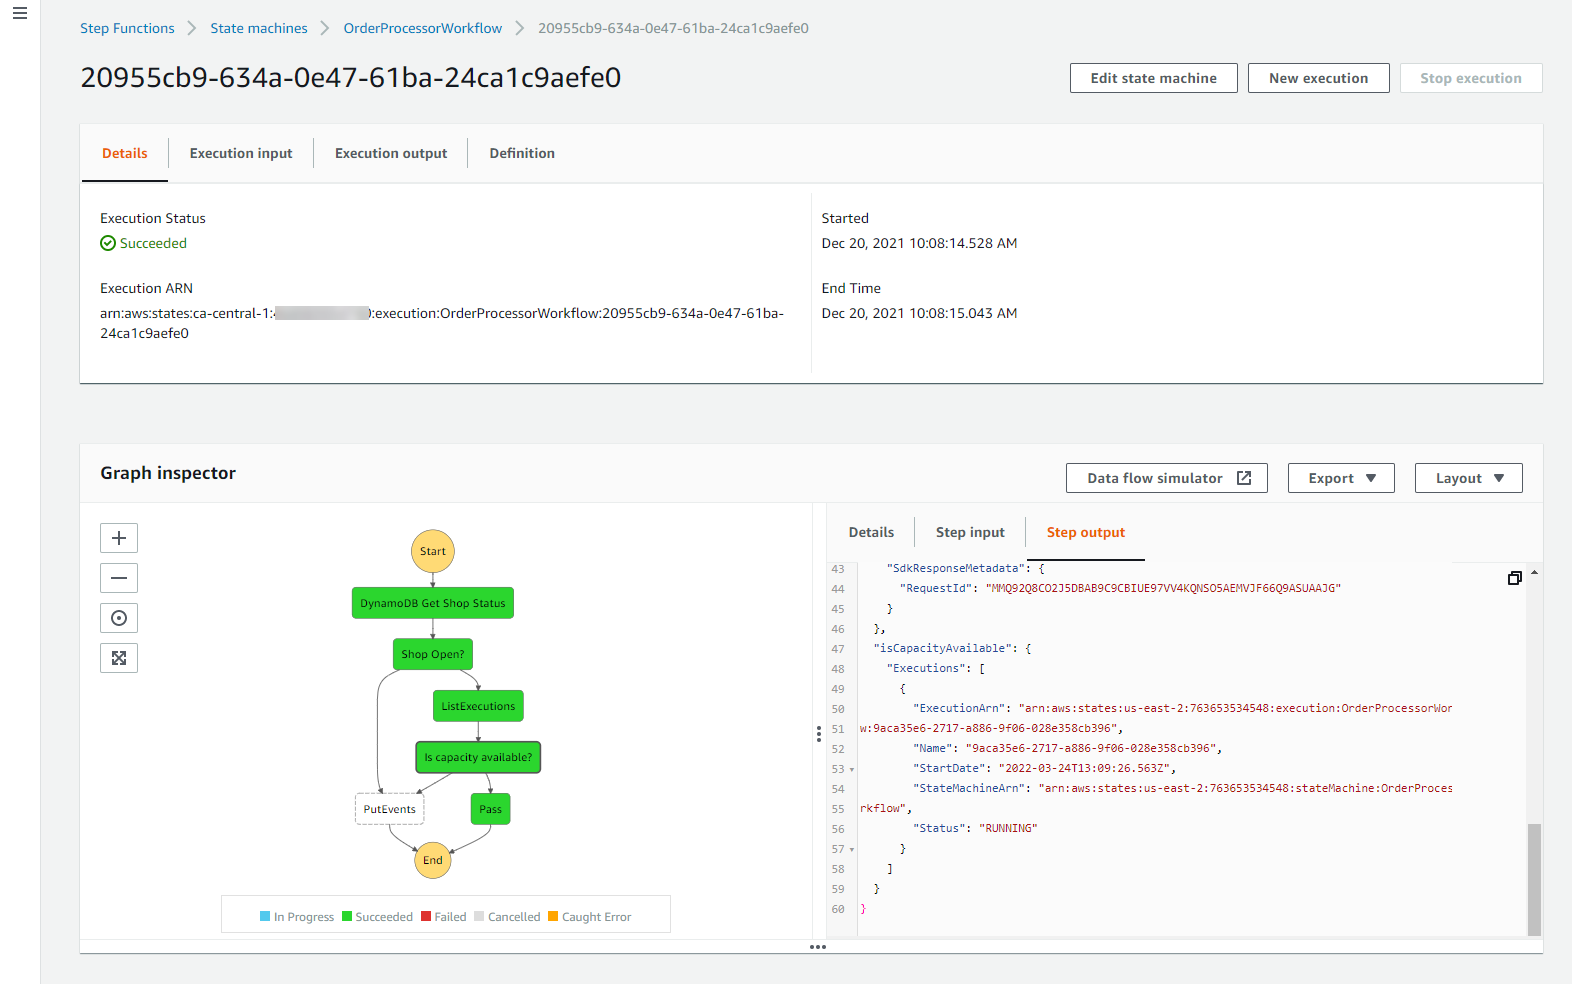
- Choose the Step output on the right side to see the output path for the choice state. In this case, the Executions array in the isCapacityAvailable attribute shows one item. This means there is one active execution, so there is capacity available, causing the workflow to go to the pass state.
Recap
- In this section, you add another choice state to the workflow.
- This checks the amount of capacity available. In this example, the shop is at capacity when there are 20 orders in the queue.
- You tested this in the console and saw how the execution flows now with two choice states.
Next steps
Next, you’ll add a human-readable order number to each execution.