Emitting events
Overview
- For timeouts, you will change the workflow to emit information about order timeouts.
- You will also add an event once the order is finished.
- You will modify the workflow to emit an event if the shop is not ready to receive an order.
- You will test the new workflow and see the input and output payloads.
After this section, you will have a workflow that emits several new events.
1. Emitting a time out event.
In this section, you add an EventBridge PutEvents state that emits an event if either the customer or barista times out an order. You have already created the logic to handle time outs so only need to use EventBridge to emit an event.
Step-by-step instructions
-
Go to the Step Functions console. From the AWS Management Console, select Services then select Step Functions under Application Integration. Make sure your region is correct.
-
From the left-hand menu, select State machine and choose OrderProcessorWorkflow from the list. Choose Edit.

-
On the next page, choose Workflow Studio to open the workflow in the designer.
-
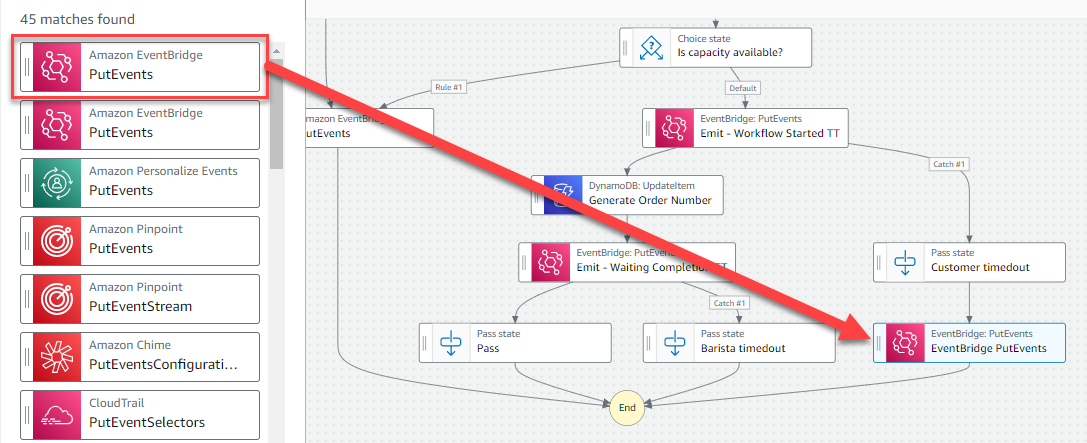
With the Actions tab selected on the left, enter
puteventsin the search bar. Drag the Amazon EventBridge PutEvents action from the list to between the Customer timeout and End states in the designer.
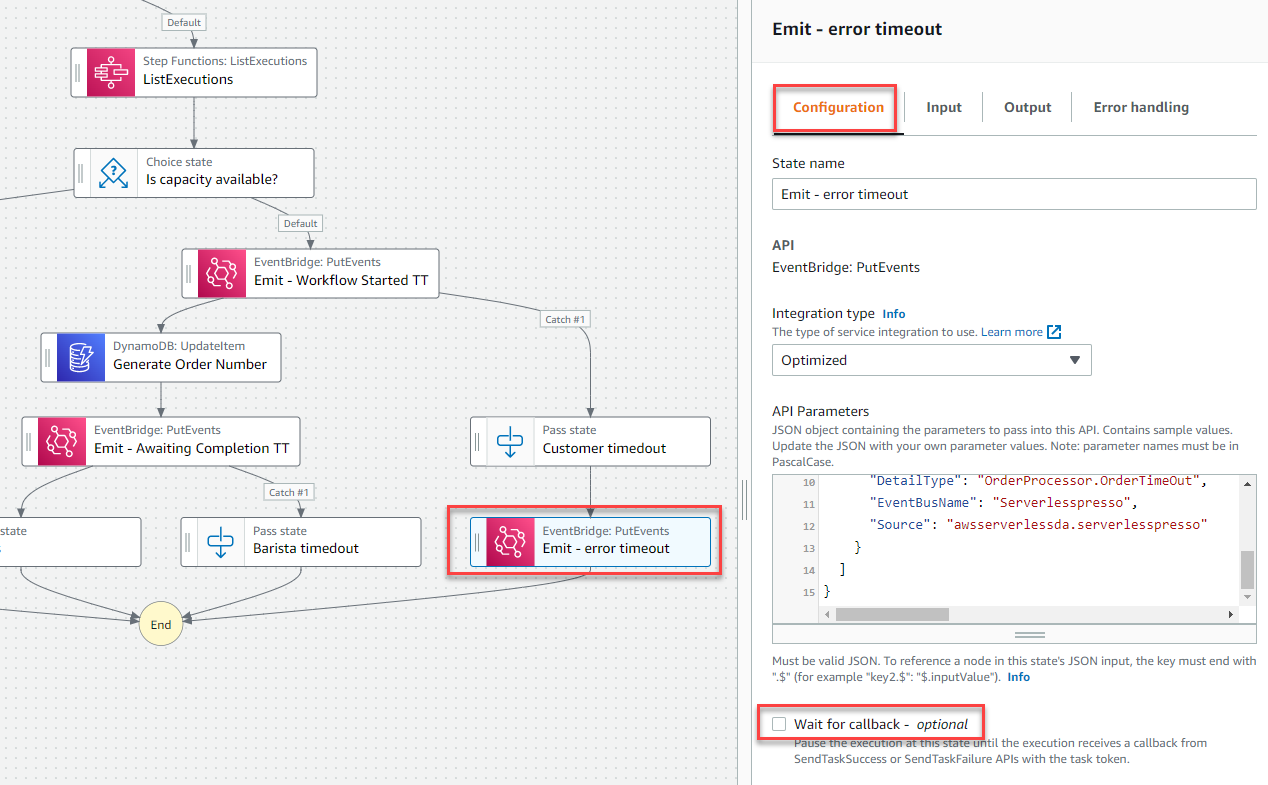
- With the state selected, the attribute panel on the right shows the configuration for this state. In the Configuration tab:
- For State name, enter
Emit - error timeout. - Ensure Wait for callback is unchecked.
- For API Parameters, paste the following JSON:
{
  "Entries": [
    {
      "Detail": {
        "Message": "The order timed out. Step Functions waits a set amount of time (5 minutes for a customer, 15 minutes for a barista), no action was taken and so the order is ended.",
        "userId.$": "$.detail.userId",
        "orderId.$": "$.detail.orderId",
        "cause.$": "$.cause"
      },
      "DetailType": "OrderProcessor.OrderTimeOut",
      "EventBusName": "Serverlesspresso",
      "Source": "awsserverlessda.serverlesspresso"
    }
  ]
}
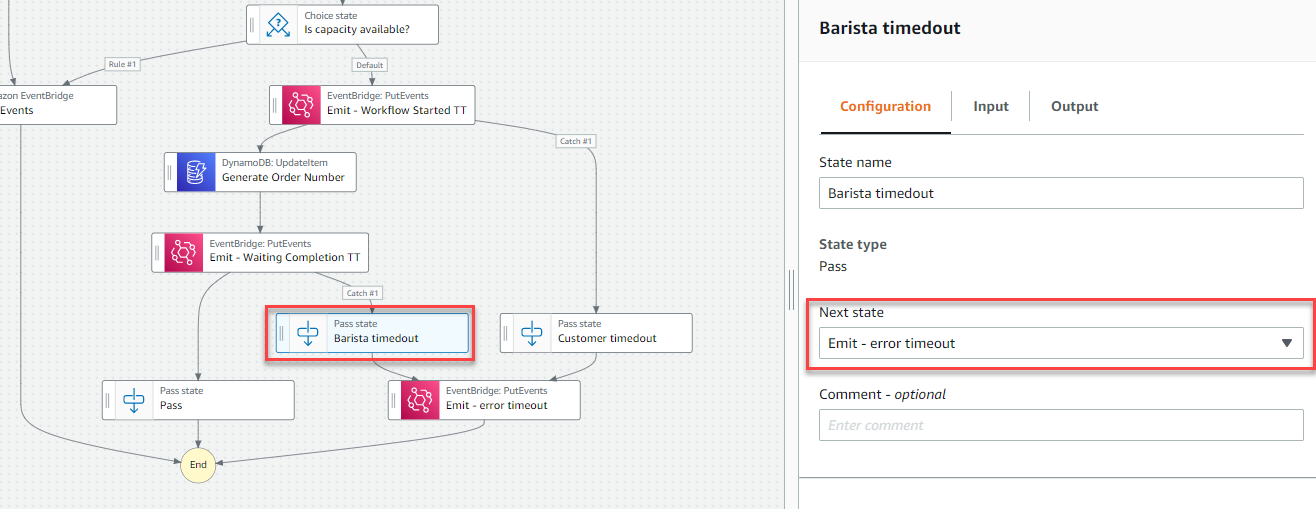
- Connect the Barista timeout pass state to the Emit - error timeout state. Choose the Barista timeout state to open the attribute panel on the right. In the Configuration tab, change Next state to Emit - error timeout.
2. Emitting an order finished event.
In this section, you add an EventBridge PutEvents state that emits a final event when the order has finished, and the workflow has completed.
Step-by-step instructions
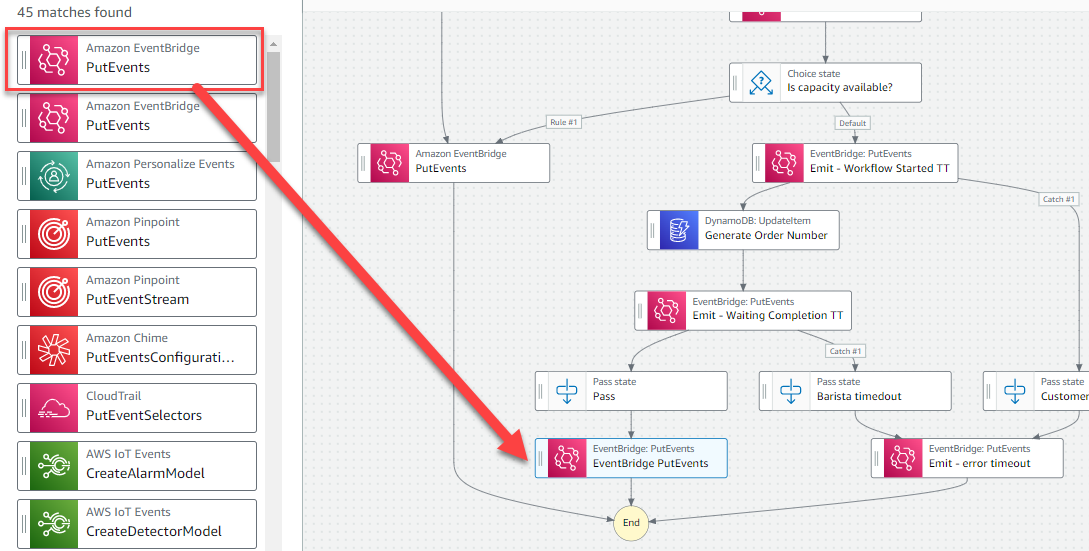
- With the Actions tab selected on the left, enter
puteventsin the search bar. Drag the Amazon EventBridge PutEvents action from the list to between the Pass and End states in the designer.
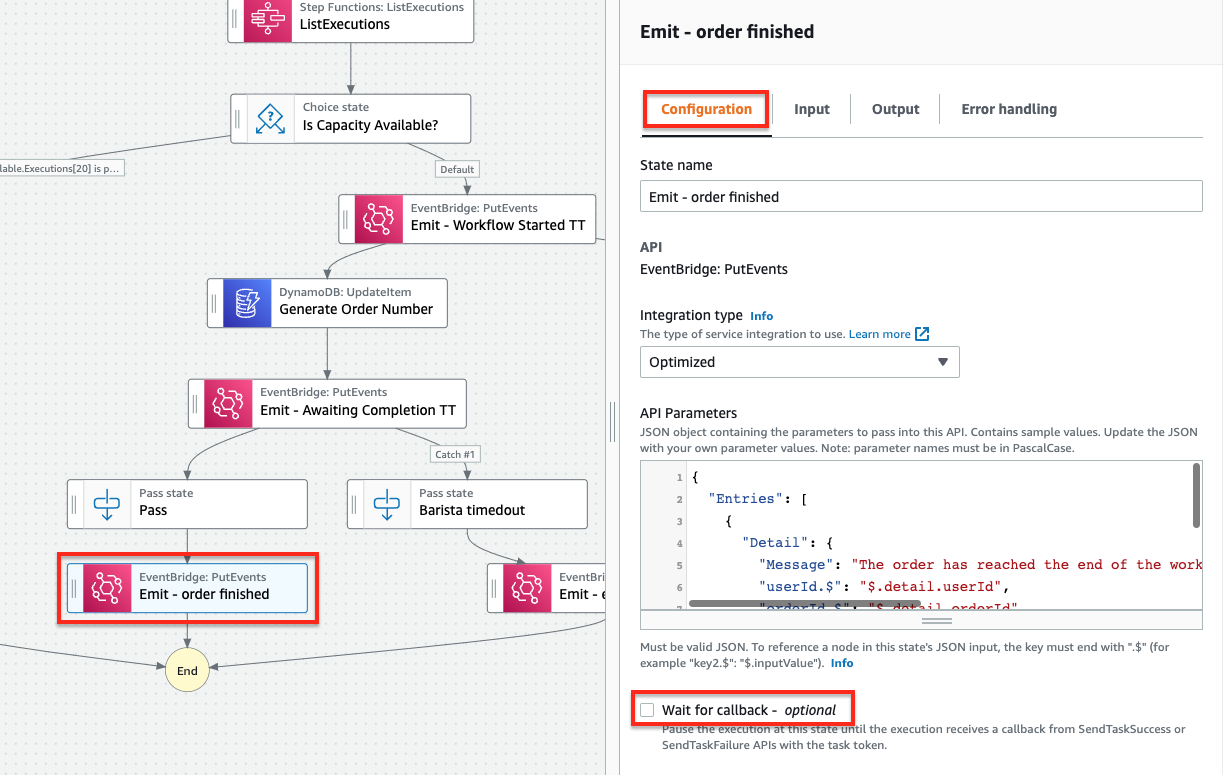
- With the state selected, the attribute panel on the right shows the configuration for this state. In the Configuration tab:
- For State name, enter Emit - order finished.
- Ensure Wait for callback is unchecked.
- For API Parameters, paste the following JSON:
{
  "Entries": [
    {
      "Detail": {
        "Message": "The order has reached the end of the workflow, and so a final event is emitted to alert other services to this.",
        "userId.$": "$.detail.userId",
        "orderId.$": "$.detail.orderId"
      },
      "DetailType": "OrderProcessor.orderFinished",
      "EventBusName": "Serverlesspresso",
      "Source": "awsserverlessda.serverlesspresso"
    }
  ]
}
3. Updating the shop not ready event.
In this section, you update the EventBridge PutEvents state that was created earlier to emit an event if the shop is closed or there is no capacity to accept new orders.
Step-by-step instructions
- Choose the PutEvents state between the Shop open? and End states in the designer.
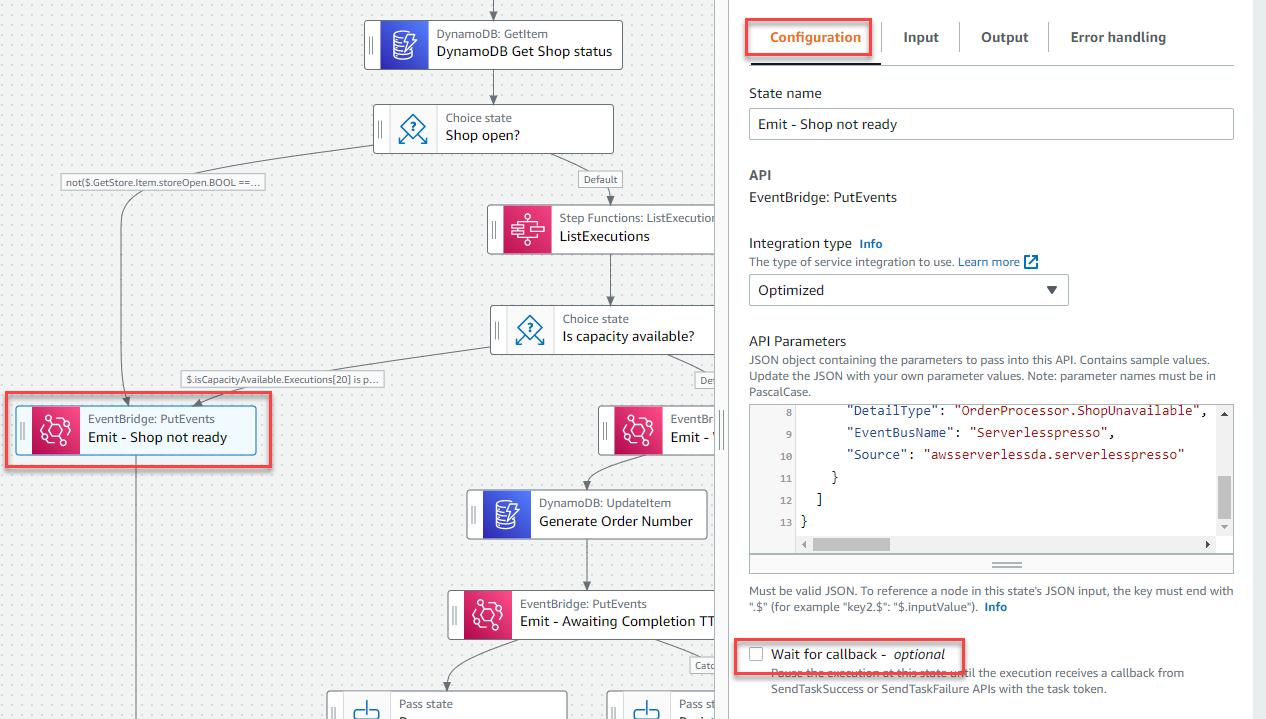
- With the state selected, the attribute panel on the right shows the configuration for this state. In the Configuration tab:
- For State name, enter Emit - Shop not ready.
- For Wait for callback, uncheck this box.
- For API Parameters, paste the following JSON:
{
  "Entries": [
    {
      "Detail": {
        "Message": "The Step functions workflow checks if the shop is open and has capacity to serve a new order by invoking a Lambda function that queries the Shop config service. The shop was not ready, and so a 'not ready' event is emitted to cancel the current order.",
        "userId.$": "$.detail.userId"
      },
      "DetailType": "OrderProcessor.ShopUnavailable",
      "EventBusName": "Serverlesspresso",
      "Source": "awsserverlessda.serverlesspresso"
    }
  ]
}
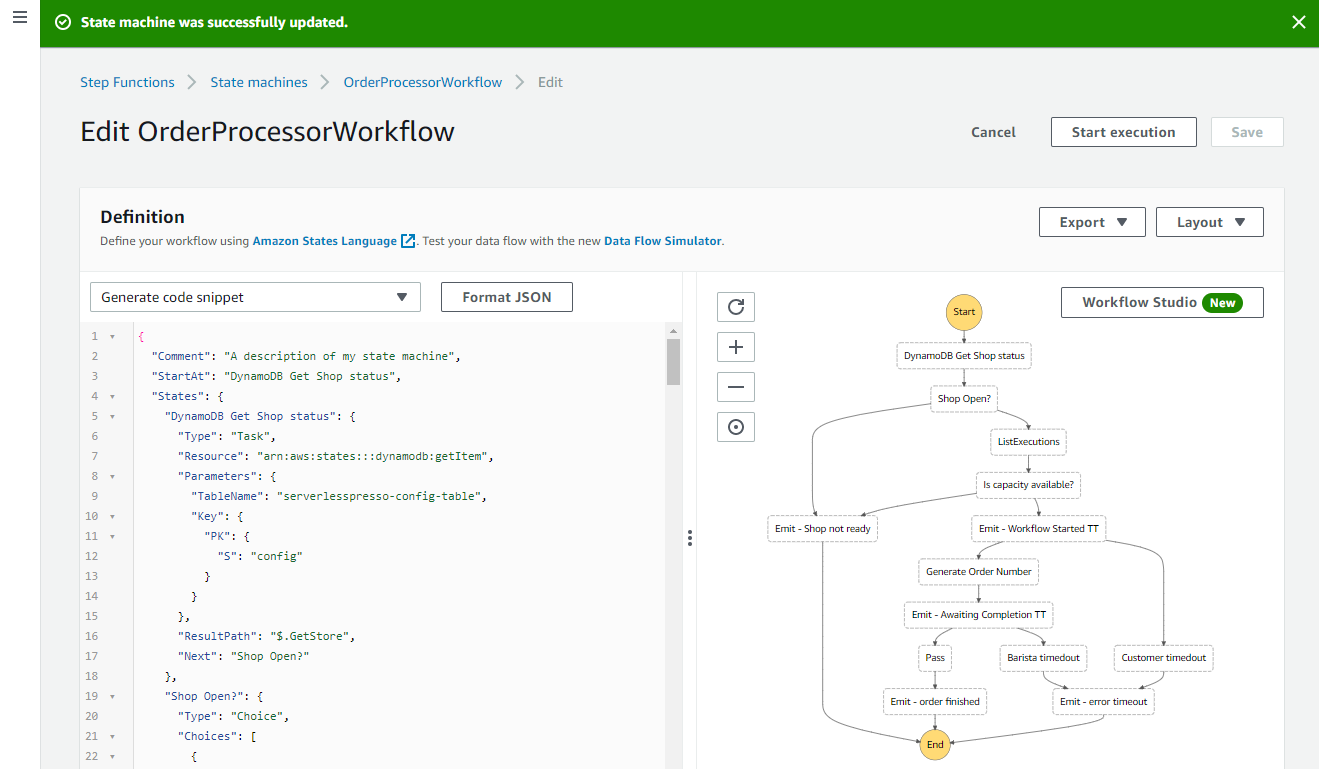
-
Choose Apply and exit. In the Edit page, choose Save.
-
In the IAM role popup, choose Save anyway.
Recap
- In this section, you configured the workflow to emit events for timeouts, order completion, or if the store is not ready to receive orders because it’s closed.
Next steps
Next, you’ll test the workflow to see how the execution path changes depending on the shop state and barista capacity.